Saturday, November 29, 2014

Chill and Thrill Pie Crust


Warm temperatures are normally welcome, but not when it affects your pie crust. Chill your ingredients and equipment so you can experience the thrill of making a successful pie crust! You can become a pie crust master. 

Yield
  •  four 8" one crust pies or two 8" double crust pies
  •  two 9" one crust pies or one 9" double crust pie

A batch of chill and thrill pie crust can be stored in the refrigerator for up to a week before using. The raw crust will appear darker, but it bakes up to a beautiful golden brown like the pie in the above picture.

Ingredients
  • 4 cups of all purpose flour
  • 1 tsp. sugar
  • 1 tsp. salt
  • 1 tsp. baking powder
  • 1 3/4 cups cold shortening  Tip: Storing shortening in the refrigerator keeps it fresh AND it is always cold for making pie crusts. 
  • 1 cold egg, well beaten
  • 1 tsp. vinegar, white or cider 
  • 1/2 cup ice cold water
Directions

  • Sift flour, sugar, salt, and baking powder into a quart and a half bowl. If my kitchen is hot, I will place the bowl of dry ingredients in the freezer for 10-15 minutes to chill before continuing with the following step. 
  • Quickly, mix in cold shortening using two cold knives, a pastry cutter, or with your hand. I prefer to mix mine with my hand. I use my fingertips.
  • Add beaten egg, vinegar, and ice cold water.
  • Mix well by hand with a sturdy spoon.
  • Keep the pie crust tightly covered and chilled until you are ready to use it. 
  • Roll the crust out on a lightly floured surface and place it into your pie pan.
I fold the crust in half , place the fold line in the middle of the pie plate, unfold the crust, and let the crust settle into place. 
  • Trim the crust about 1/4 to 1/2 inch past the edge of the pie plate. The crust will shrink about 1/4 inch as it bakes. 
  • Follow the baking directions for your pie recipe. 
You may need to cover the crust edge of the baking pie to keep it from over browning. 

Making a Pie Shield from Aluminum Foil

  • Start with a square of aluminum foil that is about a half inch larger than your pie plate.
  • Fold the square of foil in half and trim as shown above. 
  • Center the pie shield over your pie. 
  • Gently tuck the edges under the rim of the pie plate. 
  • Take care to not get the shield too tight. You just want to prevent over browning, by keeping the crust edge lightly covered.
I always put a pie shield on my pies. I remove the pie shield for the last 15 to 20 minutes.
It is much easier to put a pie shield on a cool pie and remove it carefully from the hot pie. 


Thursday, November 27, 2014

Happy Thanksgiving and Safe Travels

Hoping you have safe travels during the 2014 Thanksgiving holiday and receive many blessings. The holiday season has begun!
Bill and Sallee Bonham
Pumpkin cake with cream cheese frosting. Gobble, gobble!

Sunday, November 23, 2014

Coconut Cream Tropical Fruit Salad


My oldest daughter arrived for Thanksgiving dinner carrying a shopping bag. Her contribution to dinner was a four ingredient, fruit salad that was ready to eat in fifteen minutes. I love the ease and speed of this recipe!

Coconut Cream Tropical Fruit Salad can be served as a side dish, or as a light dessert.

Yield: about 1 quart, or 4 cups

Ingredients

  • 2-15 oz. cans of tropical fruit salad packed in fruit juice
  • 1-3.4 oz. package coconut cream instant pudding
  • milk
  • 1 - 1 1/2 cups miniature marshmallows I like to use a cup and a half.
  • Optional - 1/2 cup of chopped pecans
Directions
  • Drain juice from tropical fruit salad into a two cup liquid measuring cup.
  • Add enough milk to the fruit juice to make 1 1/2 cups of liquid.
  • In a one quart serving bowl, combine fruit juice mixture with the package of pudding.
  • Whisk for two minutes.
  • Stir in the miniature marshmallows and the drained, tropical fruit salad. 
  • Chill until ready to serve.
Variations

Try different combinations of fruit and pudding flavors.
  1. Vanilla pudding , canned fruit cocktail in juice
  2. Lemon pudding, pineapple chunks in juice, small can of mandarin oranges in juice
  3. Add 1 large banana, sliced to any of the fruit and pudding combinations.

Thursday, November 20, 2014

Spiced Pumpkin Butterscotch Mini Trifle


Just in time for Thanksgiving, spiced pumpkin butterscotch filling layered between the halves of a spice cupcake. Then, they are topped with whipped topping and cupcake crumbles. What's not to love?

AND they are portable! 

Mini trifles can be prepared the day before your party. However, when using plastic party tumblers, the dessert can be prepared ahead of time and frozen. Thaw in the refrigerator. 

Yield 15 - 9 oz. mini trifles

You will need 15-9 oz. party tumblers. I bought two - ten packs at the local dollar store for $2. 
Ingredients
1 - 16.5 oz. extra moist spice cake mix
Pan coat spray
1 - 15 oz. can of pumpkin
1 tsp. cinnamon
¼ tsp. nutmeg
¼ tsp. ginger
¼ tsp. allspice
3 cups cold milk
4 – 3.4 oz. packages instant butter scotch pudding mix
About 16 ounces of whipped topping I used Cool Whip.

Instructions
Follow package directions on the spice cake mix to make batter for cupcakes.
Spray cups of cupcake pans with pan coat spray.
Fill each cup of the cup cake pan about half full.
While the cupcakes are baking, pour 3 cups of cold milk into a large bowl.
Pour the four packages of pudding mix into the milk and blend until smooth.
Add the pumpkin and spices to the pudding and blend until smooth.
Cover and place in refrigerator.
Remove cupcakes from the pan and cool on a cooling tray until they no longer warm

Set out fifteen party tumblers
Cut fifteen cupcakes in half and place the bottom of each cupcake cut side up in the tumblers.

Put a rounded tablespoon of pumpkin mixture in each tumbler and level.
Repeat another layer with cupcake top and pudding mixture.
If you have any pumpkin mixture left, divide it between the tumblers.
Fill each tumbler with whipped topping. 
Crumble one cupcake into crumbs. I only used the center of the cupcake, not the outside edges.
Sprinkle crumbs onto top of whipped topping
Decorate with candy corn or other decoration of your choice.
Cover and refrigerate the mini trifles for at least two hours before serving.
You will have eight cupcakes left over. I place the left over cupcakes into a quart freezer bag and freeze them for my lunch.

Wednesday, November 19, 2014

SalleeShares- Holiday Baking Championship Week 2

#BakingChampionship

On the second week of Christmas my true love sent to me, seven bakers baking...lol.  I am gaining the Christmas spirit through my television viewing of Holiday Baking Championship

Week Two's Theme: Classic Holiday Flavors
Fall flavors and spices such as cinnamon, allspice, ginger, nutmeg, cloves, pumpkin, caramel, chocolate, nuts, and apples remind me of Thanksgiving, Christmas, and New Year's Eve.

Heat One: Eggnog Swirl Dessert
The seven bakers were excited to hear Bobby Deen say they would be baking with eggnog and would have sixty minutes before the heat was over. However, most of the contestants were not thrilled that the eggnog had to be in a swirl dessert.

The Bakers' Dessert Choices
  • Pastry Chef Bill Liscomb chose to make Baked Eggnog French Toast and serve it with swirled eggnog and maple syrup. Personally, I didn't think this qualified as an eggnog swirl dessert, but was a breakfast pastry or breakfast choice
  • Naylet Larochelle, the home baker who won the Week One main heat, chose to prepare Swirled Pumpkin Tart with Eggnog Whipped Cream. Yum!
  • Caterer David Bondarchuck decided upon Eggnog and Spiced Cake Swirl Cupcakes. 
  • Family Baker Dante Morasco's dessert of choice was Chocolate Espresso Obsession Eggnog Cheesecake. Seriously, I didn't understand the obsession part of the title. Is an obsession a new type of pastry? Am I that far off the web here in Mid-Missouri?
  • Master Baker Punky Egan's choice was a streusel topped, Eggnog Pumpkin Swirl Muffin with Pumpkin Butter.
  • Pastry Chef Terra Nelson immediately went with a brownie that featured a sweet potato puree and graham cracker crumb base. The top layer was reduced eggnog stabilized with white chocolate and, a Louisville, Kentucky staple, bourbon whiskey. 
  • Professional Baker Erin Campbell's choice was Sweet Potato Cheese Cake with Gingersnap Crust and Eggnog Anglaise.  
Presentation to the Judges
Pastry Chef Duff Goldman, Chef Nancy Fuller, and Pastry Chef Lorraine Pascale were less than thrilled with the taste and/or presentations by:
  • Dante - Judge comments included, "Where's the holiday?" The piped chocolate "modern" Christmas tree design on the plate didn't work.
  • Erin - A kind comment for a rough presentation, "Not a looker, but delicious." Erin struggled with having a raw cheesecake and decided to put scoops of the cheesecake into small ramekins to finish baking. 
  • David - Unanimous agreement from the judges, "Frosting is waxy." "Pedestrian." Not what a professional baker wants to hear!
  • Bill - His final presentation was beautiful BUT the eggnog wasn't the star. The judges agreed with my thought that French toast isn't a dessert and it wasn't swirled.
However, four bakers all found favor with the three judges.
  • Terra - Served a shooter of Mamaw's Spiked Eggnog with her upscale brownie. "Fab plate of food!" and "Redemption tastes good." were two of the comments bestowed upon Terra's dessert. Terra barely stayed in the competition last week. Redemption is indeed sweet.
  • Naylet - The trio of judges all agreed the eggnog flavor was spot on. Duff Goldman asked her if she would teach him to bake. Straight faced humor from the Charm City Cake owner. 
  • Punky - A beautiful presentation and flavor. 
And the Winner of Heat One is: Terra Nelson
Terra's main heat advantage? The use of an electric spice grinder. The other six bakers had to use a mortar and pestle to grind spices with. Cutthroat Kitchen's Alton Brown must have had something to do with this advantage! 

The Main Heat Challenge
Each baker was challenged to make a dessert using three classic spices and two sugars in sixty minutes.

An electric spice grinder was a definite advantage because all of the classic spices were whole. Whole nutmeg, whole allspice berries, whole cloves, rolled cinnamon bark, and a variety of sugars were presented to the seven bakers at the beginning of the challenge. 

A Bad Baking Day on National TV
  • We all have bad baking days. However, most of us do not have a bad baking day on national television. Last week, Terra Nelson found out what this feels like. 
  • This week, it was Erin Campbell's turn to burn a batch of caramel three times AND had her beaten egg whites collapse into soup for her souffle. Her end product completely failed to impress the judges. What kept Erin in the competition? She took on an ambitious dessert and did not quit attempting to scale each barrier that could have prevented her from completing a dessert. 
  • Naylet cut herself twice in the first few minutes while grating a roll of dried cinnamon bark on a hand-held grater. However, she also kept baking after the medic bandaged her injured digits.
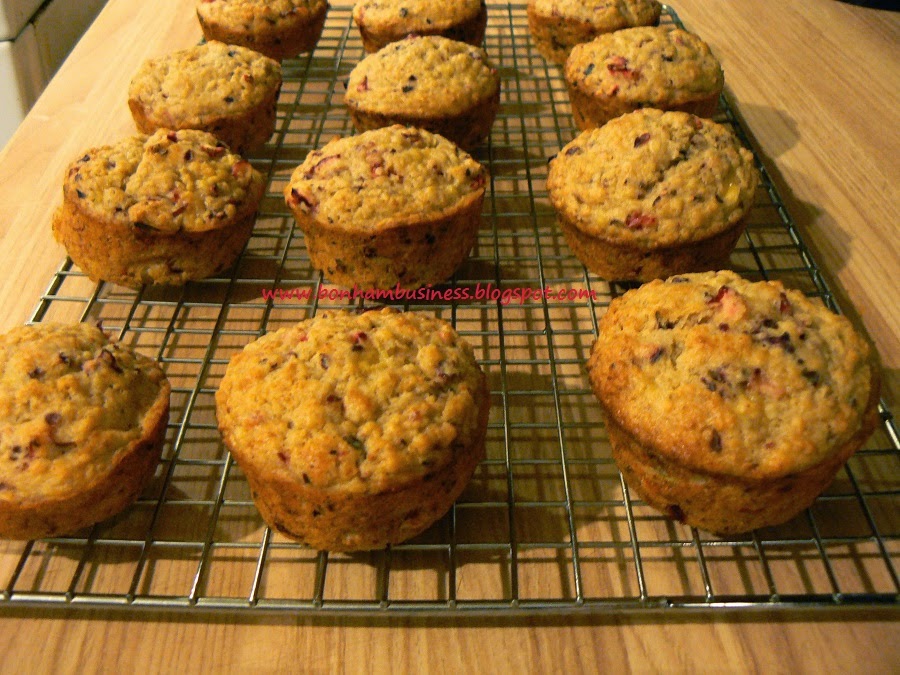
Seven Bakers Baking
  1. Cakelet with Peach Cranberry Compote  by Naylet
  2. Spiced Bread Pudding Chocolate Souffle with Caramel Sauce by Erin
  3. Apple Nut Cake with Cream Cheese Drizzle by Terra
  4. Hamantaschen by Dante. A hamantaschen is a traditional Jewish cookie that is shaped like a triangular hat around a filling.  
  5. Gingerbread Man Cookies by Punky
  6. Five Spice Orange Holiday Loaf by David
  7. Three Spice Creme Brulee by Bill
Outstanding Bakers
 Bill - Nancy and Lorraine love the Creme Brulee. Duff said," it's about the process." and he felt the custard was a tad over baked. 
Dante - Lorraine complemented Dante on his,"great pastry."
David - What a turn around from the first heat! David's bread was deemed,"Awesome!" by Duff Goldman. A lovely presentation with two wonderful sauces. 

Struggling Bakers
  • Punky was the eliminated baker. Her soft,under spiced gingerbread men with whole spice decorations fell flat with the judges. All three judges expected more from a master baker and thought Punky played it too safe.
  • Erin - Bad baking day, but she stayed in the competition.
Safe Bakers
Terra
Naylet

The Week Two Winner: Bill Liscombe and his Spiced Creme Brulee.

Monday, November 17, 2014

SalleeShares-Holiday Baking Championship

2013 Mini Snowman Cake by Sallee Bonham 
#BakingChampionship

Anticipation! (sing song voice) I have been anticipating the first episode of Holiday Baking Championship with host Bobby Deen since I saw the first preview and set the DVR to record the series.

Baking is my thing! You know that because you have seen the pics of my holiday cakes, cookies, and cupcakes. 

The Prize Holiday Baking Championship's grand prize is $50,000 and the title, "Holiday Baking Champion."

The Judges
The eight competing bakers met the judges Duff Goldman of Charm City Cakes, Nancy Fuller of Farmhouse Rules, and Lorraine Pascal, fashion model and TV cook.

Heat One
Bobby Deen introduced the first sixty minute heat of "Holiday Cookie Madness."
First, each baker unwrapped a Christmas present containing a cooking tool that determined what type of cookie they had to bake:

  • a spatula for layered cookies
  • a French rolling pin for rolled cookies 
  • a cookie press for spritz cookies
  • a scoop for drop cookies

Then, the holiday bakers began creating Christmas cookies, or as Bobby Deen said,"The cookie beast has been awakened!"

Struggling to Bake
At the end of the sixty minute heat, two of the bakers, Stephanie Hart and Terra Nelson, were obviously behind the other six contestants. 

Stephanie stated that she was a cake girl and only baked one cookie. 

Terra struggled with timing. Even using the blast chiller, her HOT layered cookies were difficult to put together with bourbon cream. Yes, bourbon cream! 

Organized and Talented
Even before the judging began, I could tell who was going to be in the lead. Some people just have a knack for being organized and quick, not one wasted movement in the kitchen. I am NOT one of those people and admire the skill.

Erin, Bill, Dante, Punky, David, and Naylet were a joy to watch in the kitchen as they created their version of layered, rolled, spritz, or drop cookies.

First Heat Results
Erin Campbell won the first heat. Her advantage in the main heat was free range of the pantry to pick a substitute ingredient of her choice.

Main Heat Challenge
Contestants must bake 3 different cookies, one dozen of each, within ninety minutes AND use three ingredients. Sounds a bit like the dessert version of Chopped!

And the Ingredients Are...

  1. Bittersweet Chocolate
  2. Fresh Oranges
  3. Toffee Bits
Smart girl Erin used her first heat advantage to substitute peppermint candy for the fresh oranges. The contestants instantly began planning the three cookies they wanted to prepare. 

Surprise!
Host Bobby Deen had a surprise ingredient for all of the bakers to use, raspberry jam. Seriously, this reminded me of the Chairman's Culinary Surprise on ICA. 
However, not one contestant seemed to be thrown off by this addition. All of them knew where and how they would use the raspberry jam. 

Flavor Combos
I loved the flavor combinations chosen by the contestants. 

  • orange ginger - Bill, Stephanie
  • bittersweet chocolate and coffee - Bill
  • orange hazelnut with raspberry- David
  • coffee toffee- David
  • orange rosemary- Naylet
  • pumpkin toffee creme brulee - Erin
  • chocolate raspberry - Dante, Naylet, Erin, Stephanie
  • orange nut - Dante
  • pistachio orange - Terra
  • toffee cinnamon - Terra
  • raspberry orange - Punky
  • toffee cherry - Naylet
  • peppermint hot chocolate - Erin
Mmmmm....makes my mouth water just reading through those flavor combos.

And the Judges Said...
The top bakers were:

  • Erin
  • Bill
  • Naylet - Home baker Naylet won the first holiday bake off! Woohoo Naylet! 
Struggling Bakers

  • Stephanie - cake like cookies. Great taste. Duff admired the fact she didn't have a recipe and baked three tasty cookie. However, they were too spongy. Stephanie was chosen to go home.
  • Terra - She was slammed by the judges for her madeleine cookie. All three judges agreed that it was the texture of sponge cake. 
Safe Bakers
David, Dante, and Punky

I cannot wait to watch the seven bakers on the next episode,"Classic Holiday Flavors."

Cookies I Am Not Familiar With
Mandelbrot 
According to Tori Avey, "Mandelbrot cookies are an Ashkenazi Jewish dessert dating back to the early nineteenth century. Mandelbrot are closely related to the Italian cookies known as biscotti, which were first made in the Middle Ages. The word mandelbrot means almond (mandel) and bread (brot) in both German and Yiddish."

Rugelach  
The wiseGeek shares this information,"Rugelach is a Jewish pastry originating in Ashkenazy, or European Jewish, culture. It has many alternative spellings, including rugelakh, rugulach, rugalach, ruggalach, and rogelach in the plural, and rugalah and rugala in the singular. The pastry is also sometimes referred to as a butter horn, nut horn, or cream cheese cookie in the United States."

Saturday, November 15, 2014

Banana Cranberry Oat Muffins


Tangy cranberries, tropical bananas, aromatic warmth from a nutmeg/cinnamon blend, and hints of salty sweet oats make this muffin a pleasure to eat for breakfast.

Yield: One Dozen

Ingredients

  • 1 large egg
  • 1/3 cup milk
  • ½ cup canola oil
  • 2 large ripe bananas, mashed
  • 1 cup frozen fresh cranberries, chopped
I buy a bag of fresh cranberries and place the bag in the freezer compartment of my refrigerator.

  • 1 cup quick cooking oatmeal
  • 1 cup all purpose flour
  • 1/3 cup packed brown sugar
  • 3 tsp. baking powder
  • 1 tsp. salt
  • ¼ tsp. ground cinnamon
  • ½ tsp. nutmeg
  • Pan coat spray, or shortening
NOTE: You may use self-rising flour in this recipe. However, do not add baking powder or salt if you use self-rising flour.

Directions

  • Preheat oven to 400 degrees Fahrenheit
  • Mash two or three ripe bananas in a small bowl and set aside


  • Put one cup of frozen cranberries into a mini-food chopper, or food processor. Pulse until the cranberries are in small pieces. Remove the chopper or processor container and place it in the freezer until you are ready to add the cranberries. Do not let the cranberries thaw.
  • Crack egg into your quart or quart and a half bowl.
  • Add milk and oil to the bowl and beat until mixed will.


  • Add the dry ingredients and stir with a large mixing spoon until the ingredients are barely blended. The batter will be thick. Do not add any more liquid to the batter.
  • Add the mashed bananas and chopped cranberries to the bowl.


  • Gently fold the fruit into the batter with the large mixing spoon. The batter does not have to be completely smooth. Lumps are okay.
  • Lightly spray the inside bottoms of each cupcake pan with pan coat spray, or shortening.
  • Using a large mixing/serving spoon, Spoon 1 spoonful of batter into the cupcake pan for each muffin until the batter is gone.


  • Bake the muffins until they are golden brown, about 20-30 minutes.
My muffins bake in 25 minutes. However, my oven is nice and hot when I put the pan into the oven.
  • Gently remove each muffin from the pan and cool on a cooling rack. I like to use a tablespoon or soup spoon to remove the muffins.

Now it is time to eat some homemade happiness on a plate!


Thursday, November 13, 2014

Baby Bottom Cake Topper for a Baby Shower

Baby bottom cakes are so cute! That round, diaper clad bottom, half hidden by a blanket, with the tiny baby toes and feet peeking out are irresistible.

I couldn't wait to try making a baby bottom cake topper for a coworkers baby shower party. The color scheme was pink and green with a scattering of polka dots. Our cake was semi-homemade because the quarter sheet cake base was from a local supermarket.

Making a cake topper is much easier than making a whole cake. This is my first baby bottom cake. Yep, my very first one. However, the end result was worth the time AND I will be much quicker the second time
However,on this first attempt, I spent about six hours making marshmallow fondant, making marshmallow cereal treats, making frosting, baking a 9" cake round,and assembling the topper.

I watched two tutorials before I attempted making this cake.
  1. Fondant baby bottom tutorial.
  2. Butter cream frosted tutorial for a baby bottom cake.

To form the baby bottom, legs, and feet, I used warm, marshmallow cereal mixture.  

Baby bottom - A small, two cup bowl is a great mold for shaping the baby bottom. 

Baby Legs and Feet - A 3 1/2 inch cookie cutter helped me to shape the legs and feet.
  •  First, I made two circles by packing warm, marshmallow cereal treat mixture into the cookie cutter; one 3/4" thick and one 1/2" inch thick.
  •  Next, I cut the 3/4" circle in half and formed two curved "legs." 
  • I also cut the 1/2" circle in half and formed the feet from these two pieces.  
Flowers - A scalloped cookie cutter and the open end of a 1M frosting tip cut the shapes for the flowers.

Name Tiles - The open end of a standard frosting tip cut the yellow circles for the name tiles. Piped, butter cream frosting is used for the lettering.


.

What I Will Do Differently

  1. For a quarter sheet cake, downsize the cake base to eight inches by two inches.
  2. Use royal icing instead of butter cream frosting for a base coat on the cereal treat pieces for the bottom, legs, and feet. Butter cream frosting just doesn't dry quickly enough.
  3. Make a template for the toes and feet.
These changes will decrease the amount of time I need for the next topper that I make.


Saturday, November 8, 2014

Hummus, Love It or Leave It?


Hummus, do you love it or leave it?

For those of you who don't know me well, I work at one of the local elementary schools. 

The sixth grade class has been working on a country project that includes a presentation. 

Believe  it or not, I volunteered to give a three minute presentation on food. Not just any food, but immigrant food that has become popular in America. Now you know where I am going with this blog post don't you? 

Hummus was one of the foods that I picked to prepare and to talk about. 

This recipe has been taste tested by twenty-four, sixth grade students and three coworkers. My taste testers heartily approved this hummus recipe. 

Just in time for the holidays, a crazy good, five ingredient hummus dip. Plus, you can make five ingredient, yogurt flat bread to accompany the dip.


Ingredients

  • 30 oz. of cooked chick peas (garbanzo beans), drained and liquid reserved
  • 1/2 tsp. salt
  • 1/4 tsp. garlic powder
  • 1 tsp. dried cumin
  • 4 Tbsp. lemon juice
I bought dried chick peas and cooked them according to the package directions.

Directions
  • Put chick peas (garbanzo beans) in your blender container. 
  • Add the salt, garlic powder, cumin, and lemon juice. 
  • Add 2-4 Tbsp. of reserved bean liquid. 
  • Blend until smooth. 
  • Taste and add more salt, if necessary. I found 1/2 tsp. to be sufficient.
  • Put hummus into a container with a tight fitting lid.
  • Refrigerate for at least one hour before serving.
Serve some pantry style flat bread with your hummus!
Five ingredients from your pantry are all you need to make a batch of
 Busy Night Yogurt Flat bread.
Yield: about 1 quart of hummus 
Note: This recipe can be reduced by using half of each ingredient.