Saturday, June 28, 2014

Patriotic Father's Day Cupcakes


 I am baking cupcakes for Father's Day Family Night at church. My type A personality kicked in about the decorating. My Google image search was very successful. After scanning the Father's Day themed pics, I settled on a decorating scheme.

Decorating Scheme

Cupcake flavor - chocolate extra moist cake mix
Icing - white butter cream
Rolled butter cream fondant - Wilton sky blue gel coloring and Wilton no taste red gel coloring
Decorations - blue fondant stars, red fondant circles stamped with a number 1.
Cupcake liners - silver foil

Directions 

Day before baking:
Make one batch of rolled butter cream fondant. Color two thirds sky blue and one third red. Wrap in plastic wrap and store in a quart freezer bag.

Baking day: 

  • Make the white butter cream icing. Cover and keep at room temperature. It will frost 24 cupcakes.
  •  Prepare and bake cupcakes according to the package directions.
  • Cool cupcakes completely
  • Remove fondant from refrigerator and warm to room temperature.
  • Using the 1M tip and a pastry bag, start in the center of each cupcake and swirl the icing outward without touching the cupcake surface. Just keep the pastry bag at a ninety degree angle and move your wrist in a circular motion.
  • Roll out the blue fondant out to about 1/8" or a little more. I do not measure.
  • Cut out 1 blue star for each cupcake
  • Place stars on cupcakes.
  • Roll out the red fondant to about 1/8" thick or a little more. It needs to be thick enough to make a good imprint with the number 1 stamp.
  • Stamp fondant with the number 1 rubber stamp. Make sure to leave enough room between each number.
  • Using the open end of the 1M tip for a cutter, cut out each number 1.
  • Place the disks on the center of each star. 

You are done!


To make the red disks: roll out fondant, stamp the fondant with a number 1 rubber  stamp,
use the open end of the 1M tip and cut out the number 1. 
1M tip and number 1 rubber stamp that
I used to make the red disks.


Tuesday, June 24, 2014

Pantry Style Beef Stew


Bill doesn't care about cooking. However, as a single man, he did master a few recipes. Pantry Style Beef Stew is a combination of Bill's basic recipe for beef stew and my additions to that recipe.  

Ingredients
  • 2 lbs. boneless chuck roast, cut into 1-inch cubes
  • 3 Tbsp. all-purpose flour
  • 2 Tsp. canola oil
  • 3 cups hot water
  • 3 medium to large potatoes, peeled and diced into cubes
  • 1 large yellow onion, peeled and chopped roughly
  • 2 carrots, peeled and sliced thinly into rounds
  • 1 – 15 oz. package beef stew seasoning mix
  • 1/8 tsp. celery seed
  • Unseasoned meat tenderizer (optional)
Directions
I start with my beef cubes on a large cutting board.
  • Lightly sprinkle beef cubes with unseasoned meat tenderizer.
  • Mix beef cubes with your hands to distribute tenderizer.
  • Lightly sprinkle the beef cubes with unseasoned meat tenderizer again.
  • Sprinkle with the 3 Tbsp. of flour.
  • Mix with your hands until the meat is well coated with flour. Do not worry if a small amount of flour remains on the cutting board.
  • Heat canola oil in a Dutch oven, or 2-quart stockpot.
  • Add the beef cubes and brown on all sides.
  • Add the hot water , seasoning mix, and celery seed.
  • Stir well and bring the beef mixture to a boil.
  • Remove pan with the beef mixture from the heat and cover.
  • Place beef stew in the oven at 350 degrees.
  • Bake for 45 minutes.
  • Remove from the oven and stir well.
  • Add all of the vegetables.
  • Cover the pan.
  • Bake for an hour, stirring every 20-25 minutes to make sure nothing is sticking to the bottom of the pot.
  • Remove lid for the last 10 minutes of cooking.
Time to eat some pantry style beef stew!

Revised 12/28/2016


Friday, June 20, 2014

Simply Terrific BBQ Ribs


I Love BBQ!
In fact, I enjoy taking an occasional BBQ road trip. For instance, I took a motorcycle (bike) ride from Belle, Missouri to Memphis, Tennessee in November. Why? For the following reasons:
1. Memphis BBQ was just calling my name. Doesn't that happen to you?
2. It was unseasonably warm for November and perfect bike riding weather.
3. I had a four day weekend and enough extra cash to cover the trip.
4. A 300 mile road trip on a bike is FUN!
The custom HD that I rode to Memphis, Tennessee on a BBQ road trip.
I have found a "Simply Terrific BBQ Ribs" recipe. No grilling required. 
Three pound rack of pork loin back ribs 
1. Start with a three to four pound rack of pork ribs. This doesn't have to be exactly three pounds, but close to it. I've used baby back ribs, pork loin ribs, boneless country-style ribs, and plain old pork ribs. Just make sure you have about three to four pounds of meat. 
2. You make a simple dry rub that gets rubbed over the rack of ribs before tightly wrapping the rack of ribs in a double layer of aluminum foil.
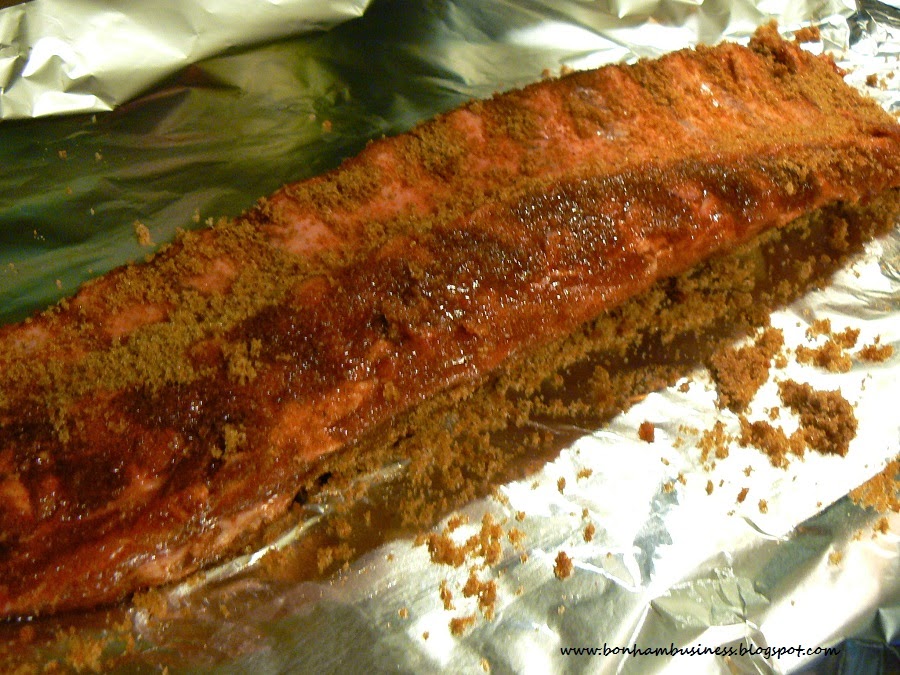
Dry rubbed rack of ribs before wrapping in aluminum foil.
3. After tightly wrapping the ribs in aluminum foil, you place them on a shallow baking pan and place them in a preheated 325 degree oven (Fahrenheit)for two - two and a half hours. How simple is that?
Two and a half hours later, the ribs are terrifically tender.
4. The tender rack of ribs is cut into two or three rib portions.Bill and I like three rib portions. We eat one three rib portion for supper and we save the other portions for lunch. 
Three rib portions waiting for BBQ sauce.
5. After applying sauce to the bony side, place the ribs under the broiler and broil for two to three minutes.
Remove from the oven and turn each piece so that the meaty side is now up.
BBQ sauce applied to ribs and ready for the broiler.
6. Apply BBQ sauce to the meaty side and return to the oven and broil for anther two to three minutes. Remove from the oven and serve with your favorite sides - coleslaw, baked beans, potato salad, pickled beets, green beans, etc.
Plated rib section with Cravin' Craisin Coleslaw.

Recipe for Simply Terrific BBQ Ribs        Revised on 5/10/2016

Ingredients

about 3 - 4 lbs. of  pork ribs
3/4 cup light brown sugar
1 tablespoon paprika
1 tablespoon garlic powder
1/2 tsp. Old Bay Seasoning
1 bottle of your favorite barbecue sauce - Ours is Kraft Sweet Honey.

Directions
  • Preheat your oven to 325 degrees Fahrenheit
  • Peel off any tough membrane that covers the bony side of the ribs. I haven't bought any ribs that had a membrane on the bony side. 
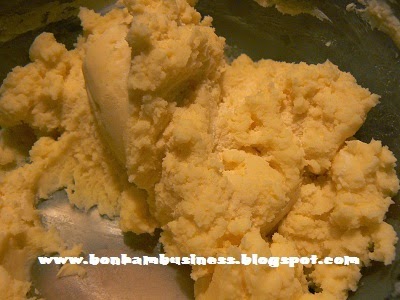
  • In a small bowl, place the brown sugar, paprika, garlic powder, and Old Bay Seasoning. Mix well to make the dry rub.
  • Apply the dry rub to ribs on all sides.
  • Lay ribs on two layers of foil, shiny side out and meaty side down. 
  • Lay two layers of foil on top of ribs and roll and crimp edges tightly, edges facing up to seal.
  • Place on a baking sheet, or shallow baking pan. I use the bottom of my broiler pan.
  • Place the wrapped ribs and pan in the preheated oven.
  • Bake for about two to two and a half hours. You can check the ribs when they have baked two hours, but if you are using meaty ribs let them bake for the full two and a half hours. Use an oven thermometer to make sure your oven is at 325 degrees Fahrenheit. 
  • Remove the baking sheet, or shallow baking pan, of wrapped ribs from the oven.
  • Turn your stove's broiler on and let it preheat.
  • Carefully unwrap the rack of ribs. There will be steam and juice inside the foil.
  • Slice the rack of ribs into serving portions of 2 or 3 ribs each.
  • Arrange portions on a foil lined broiler pan, bony side up.
  • Coat the bony side of each portion with barbecue sauce. Make sure you coat the cut sides.
  • Broil about six inches below the broiler element or flame for 1-2 minutes, or  until the BBQ sauce is cooked on and bubbly.
  • Turn ribs over and coat meaty side with barbecue sauce. 
  • Broil the meaty side for 1-2 minutes.
  • Your ribs are now ready to serve!
Is your mouth ready for some crazy good homemade happiness on a plate?


Thursday, June 12, 2014

Browned Sage and Onion Rice


Okay friends, this is my answer to boxed rice products. For years I used prepackaged rice side dishes to accompany my home cooked poultry. Then I discovered the trick of browning regular, raw, white rice in butter.

Browned rice does not stick together in clumps and lumps. Instead, the rice is fluffy and golden brown. The butter browns the rice, but it also adds a buttery richness to every bite.

The amount of sage in the recipe can be adjusted from a "barely there" 1/4 teaspoon. to an "okay I taste sage" 1/2 teaspoon (or more if you want).


Ingredients


3 Tbsp. salted butter
1 cup white rice
2 chicken bouillon cubes, or 2 tsp. instant chicken bouillon
1 tsp. dried minced onion
1/4 tsp. celery seed
1/4 tsp.to 1/2 tsp. ground sage  I use the lesser amount.
Salt as desired


Directions


First
  • Heat 2 cups of water in a microwave to boiling
  • Add the 2 bouillon cubes
  • Stir until the cubes dissolve
  • Set aside

Second

  • Melt butter in a 4 to 6 cup saucepan. 
  • Add 1 cup of rice
  • Saute the rice in the butter until the rice turns golden brown. 
  • Remove the pan from the heat
  • Carefully add the 2 cups of chicken bouillon water
  • Add the remaining ingredients
  • Stir until the spices are blended into the broth, once or twice
  • Place the pan of rice back on the burner
  • Bring the mixture back to a boil
  • Cover with a tight fitting lid
  • Reduce heat to low.
  • Simmer for about 20 minutes. 
  • At 15 minutes, if the pan isn't steaming, or you can't hear it simmering, shut the heat off and leave it on the hot burner for 5 minutes. No peeking! Then, follow the next step.
  • Remove the pan from heat, but do not remove the lid. No peeking!
  • Let the pan of rice sit for 5 minutes
  • Remove the lid and stir with a fork to fluff the rice up.
  • Taste and add desired amount of salt. The salt in the bouillon and butter are enough salt for me, but Bill always adds salt to his. He's a salt-aholic. 
Yields 3 cups of rice


Wednesday, June 11, 2014

Cornish Game Hen for Two

Looking for a special main dish to cook for your sweetie? If your sweetie likes chicken and turkey, then Cornish game hen is guaranteed to be a success for your romantic, or holiday dinner.

Cornish game hen is my go to bird when Bill and I are tired of  our usual main dishes with beef, pork, turkey, chicken, and shellfish. Plus, game hens just make dinner seem a little more fancy.

Game bird halves cook faster than a whole bird. If you are tempted to turn the heat up, do not do it! Your bird will be dry and overcooked. Trust me, I know this from experience.

Slower heat and patience guarantees a bird with juicy, tender meat.  Higher heat will cook the bird quicker, but you maybe having a dry bird for dinner.
Ingredients

  • 1 Cornish Game Hen, thawed and cut in half (along the backbone and through the breast)
  • canola oil
  • Rainbow Peppercorn Blend, or black pepper
  • garlic powder
  • fine sea salt, or table salt
  • 2 Tbsp. salted butter, melted
NOTE: This recipe maybe doubled for 4 servings.
                                                 

Directions

  • Preheat oven to 325 degrees Fahrenheit.
  • Pour melted butter into a rectangular, 2 quart baking pan.
  • Rub each game hen half with canola oil and 
  • sprinkle with fresh ground, rainbow
  • peppercorn blend; garlic powder, and fine sea salt.
  • Put the oiled and seasoned halves, skin side down into the casserole pan.
  • Place the casserole pan into the oven and bake the game hen halves for 30 minutes. Turn halves skin side up. 
  • Continue cooking for another 30-40 minutes, or until the game hen is golden brown and the drumstick moves easily at the joint.
  • Turn the oven off, but let the game hen rest in the oven for about 10-15 minutes before serving it.
Serve with your favorite veggie salad, pasta salad, and a side dish. Enjoy a special meal with your sweetie!
Revised 12/28/2016

Saturday, June 7, 2014

Kitchen Disaster Popcorn Mix

On Wednesday, this blog post was supposed to be an update about coating popcorn with almond bark and mixing in a cranberry nut trail mix that I found at the local Wally World store.

After shuffling some ingredients around on the pantry shelf, I discovered that I had forgotten to buy vanilla almond bark AND chocolate almond bark. Dang it!

Substituting white chocolate chips was supposed to be the solution to this problem. However, my genius brain decided that the melted white chocolate chips were too thick. The solution to that problem was to melt butter with the chips. This is a solution if you melt the butter to the same temperature as the melted chocolate before you mix it together, but I didn't do that.


 Nope, I just chunked up the cold butter and stirred it into the melted white chocolate. The chocolate promptly seized. As a watcher of cooking programs, I have seen chefs and cooks say that their chocolate "seized". Now I know exactly what that means. The thick, melted chocolate became a gummy, stiff, granular mass.        
                                                                

Now what? Fortunately, there was a bag of  milk chocolate chips in the pantry. Putting melted milk chocolate on popcorn wasn't my favorite choice, but getting a blog post done caused me to go ahead and follow this plan. The melted milk chocolate chips were thick and going to stay that way!


After stirring the chocolate into the popcorn mixture, I carefully spread it out onto a wax paper-lined tray and put it in the freezer for five minutes like I do with almond bark. Carefully I pulled the tray out of the freezer. The chocolate promptly began to sweat and return to a thick, sticky state. OMG! Now what? Bill was the recipient of a bowl containing sticky, chocolate covered popcorn mix. Then, I dumped the rest of the mess into a repurposed ice cream bucket and went to bed.


Yesterday, I took the lid off of the ice cream bucket and found that in the eighteen plus hours that I had ignore it; the milk chocolate had returned to a solid state on the popcorn. Milk chocolate coated cranberries could be my new food crave! Bill and I ate most of the bucket while watching Grudge Match last night.


Moral to this story:


No almond bark on the pantry shelf means no popcorn mix in the bucket.


Ingredients

Yields about 10 cups of popcorn mix 

  1. 1 - 10 oz. bag of Cranberry Nut Trail Mix (main ingredients are dried cranberries, peanuts, sunflower seeds, and dark chocolate chips)                                                                               
  2. 2 - 2.75 oz. bags of  94% Fat Free Microwave Popcorn, popped (about 10 cups)                 
  3. 12 oz. bag of milk chocolate chips                                                                                             
       

Directions

  • Follow package directions and pop the popcorn in your microwave
  • Place popcorn in a large bowl
  • Add Cranberry Nut Trail Mix to the popcorn
  • Melt chocolate according to package directions
  • Slowly stir into the popcorn mix
  • Spread onto a wax paper-lined shallow tray
  • Allow to dry until the milk chocolate is hardened.
  • Put into a large lidded container. I used a repurposed ice cream bucket.

To make some vanilla almond bark coated yumminess follow the recipe for my original popcorn post.