Saturday, April 30, 2016

Almost a Fail - Pineapple Pecan Cake

Not the prettiest cake, however it taste GREAT as it slides over your tongue!
Girl sees recipe and thinks,"Yum!"
After scanning the pantry and 'frig shelves, girl thinks,

"I bet that pineapple cake mix would work just fine AND cherry pie filling with pecan cream cheese frosting will be amazing!"

Lovers of cherry pineapple dump cake, you all know what I'm talkin' about don't you?

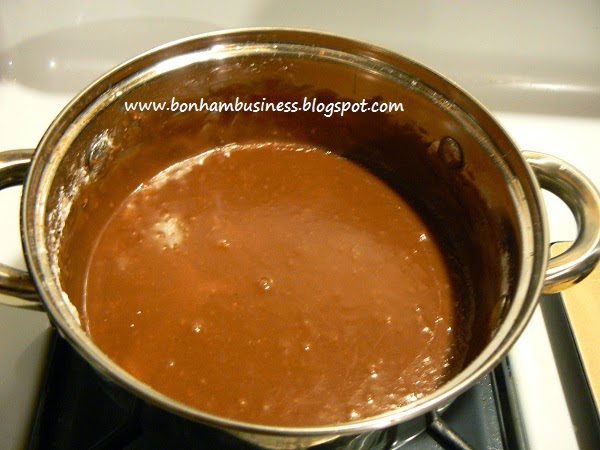
Anyway, I assembled my ingredients and began to follow the recipe directions exactly, except for my adjustments.

Then, the hubby said,"Who is that cake for?" and I being a good wife replied,
"For you honey"
Guilt caused me to say it. I swear. I know he isn't getting enough quality time with me lately. 
Cake batter ready for the oven. Ignore the aluminum foil in the picture.  I was making supper and baking at the same time. 
Even though I knew that cake needed to be cooled on the baking rack, wrapped up in plastic wrap, and chill in the 'frig overnight, I told him it was for him....tonight.

I need to make sure my man knows he is first, don't I? Go ahead, laugh with me!

Now onto the sad part, the fail.

I used a pineapple cake mix I bought on sale to see how it would taste. Here is a one word description for the taste of the cake mix- artificial.

Yep, I could taste the artificial pineapple flavoring in spite of the fact that I put a 20 ounce can of crushed pineapple, juice and all, into the batter.

Impatient to get the cake to cool down,
I placed the almost hot cake in the freezer compartment of my 'frig for an hour or so. Thinking it was cool because it was cool to the touch, I cut the nine inch, round layer in half to discover.....warm cake.

Too bad I had already separated the halves.
The cake hadn't separated cleanly in half. The warm center of the cake stuck together and pulled the center of the top cake layer out,leaving a bowl shaped center in the cake round. AND, the darn top layer started cracking apart.

However, I went ahead with filling and stacking the cake.
Carefully, I spread a thin layer of frosting over the cut sides of each layer before piping a border, or dam of frosting, around the outside edge of the bottom layer. The cherry pie filling filled the dam, or circle of frosting on the bottom layer. Quickly, I flipped the top layer onto the bottom layer, spread more pecan cream cheese frosting over it to hide the cracks, and sprinkled it with chopped pecans.

Yes, I could have waited, but the hubby was waiting for a slice of cake! 

Yes, my cake was almost a fail.
After sitting in the 'frig overnight, the cake settled down and sliced into beautiful even slices! After spending twenty-four hours in the refrigerator, the artificial flavor was not nearly as apparent. Plus, cherry pie filling and pecan cream cheese frosting do indeed meld into a sweet, silky smooth marriage of flavor that is heavenly.

Moral of this Story
 "Haste in cake makes waste." BUT we still ended up with a slice of homemade happiness on a plate!
After chilling in the 'frig overnight, the cake sliced perfectly.
For the original, great recipe     CLICK HERE      The frosting alone is worth having the recipe! 

NOTE
The original recipe calls for an 18 ounce cake mix. Due to downsizing, most cake mixes are NOW less than 16 ounces. You have two choices.
1. Use two 8 inch round pans, or
2. Use 2 boxes of cake mix, fill three 8 inch round pans, and make cupcakes with the extra batter.          


Saturday, April 23, 2016

Spring Flowers Strawberry Lemonade Cake

This is the second cake that I created for a silent auction. Both cakes brought in about $50 each.
Just saying strawberry lemonade cake makes my mouth water! 
Freshly squeezed lemon juice and lemon zest turned a strawberry cake mix into a strawberry lemonade cake.
I added about 1 tsp. of lemon zest and the juice of 1 lemon to two boxes of strawberry cake mix. 
This will make four 9 inch layers. I used three layers for the cake and froze the 4th layer in the freezer. I will make cake pops with it at another time.
Additionally, a fresh lemon butter cream filling is nestled between the three cake layers.
Rolled butter cream fondant made with brown vanilla extract created an ivory fondant. 
Leaf green, lemon yellow, and pink gel coloring turned the ivory fondant into the bright, spring colors that I desired. The finishing touch - dry brush with a light coat of gold luster dust over the leaves and flowers.

Fresh Lemon Butter Cream recipe                             Click Here

Rolled Butter Cream Fondant recipe                         Click Here     Use the 3 lb. amount 

Tuesday, April 19, 2016

Chocolate Caramel Turtle Layer Cake

This cake brought in about $50 at a silent auction. I am pleased.
When a coworker asked if I could donate a cake or two for a benefit, 
I said yes and immediately told her I could make a chocolate caramel turtle cake.
Obviously, my brain had already been thinking about cake! 
Yes, I had been looking at cake pictures and made up my mind to make a "naked cake meets turtle layer cake".
Naked wedding cakes continue to be popular, but I didn't want to tackle a wedding cake. Instead, I chose to make a naked three layer cake combined with a chocolate caramel turtle cake! Marvelous isn't it? My cake was inspired by a cake picture I saw over on another blog.  
The Filling
Caramel butter cream frosting, chopped chocolate pecan mini-turtle candy, drizzled caramel sauce, and drizzled chocolate glaze sounds decadent doesn't it? The caramel butter cream frosting is also used to pipe the rosettes onto the chocolate glazed cake top. Scroll down below the frosting recipe for specific directions on how to fill the cake layers. 

The Cake Layers
I used two Devil's Food Chocolate cake mixes and prepared them according to package directions. I baked four 9" layers, but only used three. I wrapped the extra layer in plastic wrap and put it in the freezer to use for a dessert. I am thinking of a layered dessert using chocolate cake, pie filling, and whipped topping. 

To Stack the Caramel Chocolate Turtle Cake
Level the tops of two layers and stack them top down with filling in between.
The top layer still has the domed top on it and it's stacked top side up. The chocolate glaze is poured over the cake top and spread quickly with a spoon. Scroll down below the frosting recipe for specific directions on how to fill the cake layers. 
Recipes

1. Two Ingredient Caramel Sauce

15 unwrapped caramel candy squares
1 Tbsp of milk
  • Microwave the candy and milk  for about 1 minute or until the candy is melted. 
  • Stir until smooth. 
  • If the sauce is too thick, add 1 tsp. of milk and stir into the melted caramels. 
  • Drizzle the sauce from a spoon onto your cake filling, cupcake etc. 
2. Chocolate Glaze

1/3 cup butter
2 cups powdered sugar
3 Tbsp. cocoa
2-3 Tbsp. hot water
  • Heat butter in a saucepan until melted


  • Stir in powdered sugar and cocoa with a whisk. It will clump up, but that is okay.
  • Whisk in the hot water, one tablespoon at a time, until the glaze has a smooth consistency like honey or thick syrup. 
  • Drizzle glaze from a spoon, or pour onto the top of a  9 inch layer cake.
The glaze sets up quickly and needs to be stirred frequently as you are using it.

3. Salted Caramel Butter Cream 
Ingredients

1/2 cup shortening
1 cup salted butter, softened 
2 lbs powdered sugar
1 teaspoon vanilla
15 caramel candy squares, unwrapped
1/4-1/2 cup milk
1/4 tsp. fine sea salt

Directions
  • Place shortening and butter in a large bowl and blend with an electric mixer on low speed until smooth. Gradually add 1/3 of the powdered sugar and continue beating until combined
  • Add vanilla extract and 1/4 cup of milk
  • Gradually add another 1/3 of the powdered sugar and continue beating until combined.
  • Add last 1/3 of powdered sugar and beat until combined. 
  • Next, put 1 Tbsp of milk in a microwaveable bowl and add caramel candy squares
  • Microwave on high for about 60 seconds or until the candy is melted.
  • Stir until smooth
  • Add the melted caramels and 1/4 tsp of fine sea salt to the butter cream frosting and stir until combined.
  •  If necessary, add up to 4 Tbsp of milk, 1 Tbsp at a time until the frosting is smooth and thick, 
  • Cover the bowl tightly with plastic wrap until the frosting is ready to use.
To Use the Frosting as a Cake Filling 

  • Put a 1M decorating tip into a 12 to 16 inch pastry bag.
  • Fill the pastry bag with frosting.
  • Pipe a nice, thick line of frosting 1/4 inch from the edge of the cake layer.
  • Using a spoon, put about 1 cup of frosting inside the piped circle and spread it out inside the circle. 
  • Add chopped pecan turtle candy; drizzle caramel sauce and  chocolate glaze over the chopped candy.


Saturday, April 16, 2016

Tale of a Crazy Cupcake Maker


I work full-time by necessity. At night, I bake and write to my heart's content. 
Occasionally, I seem to forget I work 40+ hours a week and volunteer for a baking project. (smile) Yes, I took on a baking project for work.
Did I mention that I work at a rural, elementary school? No? Well, I do and I took on a now annual project. 
It's annual because this is the second time I have volunteered for this particular project. Yep, I know   c---r---a--z--y! 
Most school districts try to "pump up" the students about taking the annual spring assessment test for their state. 
Our school district also participates in this process to excite and enthuse the students about taking an hours long, computerized test. 
Last year"s theme for grades three to six was: "Superheros Fly Away With a Good Book."
My volunteer baking project was a trio of half sheet cakes decorated with superheroes and books. 
After baking, decorating, and transporting three half sheet cakes, I swore to NEVER take on three half sheet cakes again. 
Instead, a single half sheet cake with coordinated cupcakes would be MUCH better! Shaking your head and laughing at me aren't you? It's okay. I am doing the same thing, too. I'm enthusiastically c--r--a--z--y! 
Actually, my volunteer baking project turned into one hundred and fifty, ROCK the MAP! cupcakes.
Yes, I thought this all up on my own and the idea was enthusiastically received by my coworkers when I said I could this for......wait a minute.....drum roll please..... $50. 
The actual cost? $52.00 and 16+ hours of my evenings at home. 
Yep, c----r-----a----z---y! 
Anyway, my grand plan calls for:
  1. a cupcake to be placed into a 10 oz. party cup
  2. pipe orange frosting onto the cupcake
  3. place a fondant record decoration on top of the frosting
  4. slip the cup-ensconced treat into a clear treat bag. 
  5. THEN, decorate and close the bag with strands of yellow and black curling ribbon. 
  6. place the beribboned treat bag into a cardboard box
  7. deliver the cupcakes to work on the Friday before testing starts.
Piece of cake, right? Yep, this was going to be much easier that three, half sheet cakes.
Sunday evening from 6:00 P.M. to 6:30 P.M.
The grand plan begins with making three pounds of chocolate fondant and coloring it black. That should be enough for 150 - two inch disks wouldn't you think? 
Monday Morning from 4:00 A.M. to 6:00 A.M.
I wake up at 4:00 wide awake and decide to roll out and cut the fondant records. After making a pot of coffee, I make 138 - two inch fondant disks. This uses all of the fondant that I made on Sunday. Time to dress for work and leave a note to myself, "Make more fondant! Need 12 more records.
Monday Evening from 6:00 P.M. to 8:00 P.M.
Time to make another pound and a half of chocolate fondant, color it black, roll it out, and cut 19 more two inch disks. Extra is a good thing!
Tuesday Evening
It was such a long day at work. I decide to hangout on the love seat with the hubby instead of decorating the 156 blank fondant records that are waiting for me. After all, I had until Friday morning.
Wednesday night from 6:00 P.M.- 10:00 P.M.
After supper, it is time to bake, package and box 150 cupcakes. After this task is done, I decide it's late and the frosting can be done on Thursday night. I also decide to wait until Thursday to make royal icing and decorate the blank fondant records.

Thursday Evening at 5:00 P.M.
I arrive home with 14 hours to finish this project! It's crunch time!
Immediately, I start mixing a large amount of yellow royal icing. It is time to pipe a circle and  "ROCK IT!"  on the 150 fondant records. 
At 6:00 P.M. my thoughtful, supportive husband announces he will buy and pick up a pizza for supper. He is a keeper!
Remember, I was supposed to have this done on Tuesday night, but didn't do it. 
Four hours later - at 9:00 P.M.
I finished adding a circle and 2-3 music notes on the last fondant record. 
I immediately make two double batches of orange frosting. My estimate said this amount will be enough for 150 cupcakes, and then the following process began:
  •  load up a 16 inch pastry bag with frosting
  • frost cupcakes until I have no more frosting in the piping bag
  •  add record toppers
  • place the completed cupcakes into a treat bag
  • put the bagged cupcakes back into a box - I have limited space in my kitchen.
Three hours later - at Midnight
I am beginning to wonder if I have enough butter cream frosting to complete my project. A quick check of the pantry reveals - No More Powdered Sugar
"I could be in big trouble!" runs through my tired brain. We live in rural Missouri and the nearest 24 hour Superstore is 20 miles away.
At 1:00 A.M. Friday Morning
I bow my head and pray to Jesus to extend my frosting. After praying, I realize I still have about two cups of yellow royal icing. I dump it into the orange butter cream frosting and stir the two together. 
There was just enough frosting to finish the last 26 cupcakes. I thank Jesus, make a pot of coffee and take a thirty minute break.
                                                 At 1:30 A.M. Friday Morning
It is time to start tying the lengths of black and yellow curling ribbon onto 150 bags. By now, I know it will take me at least 3 hours. I keep drinking coffee. 
                                                 At 5:00 A.M. Friday Morning
The last bagged cupcake receives it's ribbon and is placed back into the container. 
              Yep, I just pulled an all-nighter to make cupcakes. C--R--A--Z--Y! 
In spite of feeling like a crazy woman, I am also feeling a sense of accomplishment. After a quick sigh of relief, I start another pot of coffee, take a shower, dress for work, and fill my car with boxes of beautifully packaged cupcakes.

Moral  of the Story
 Thou shall not procrastinate to decorate!


Wednesday, April 13, 2016

Turtle Chocolate Layer Cake - Life Love and Sugar

I am so making this cake! Hope to post pictures of my lastest slice of home made happiness on a plate!

Turtle Chocolate Layer Cake - Life Love and Sugar

Here it is! The Bonham Business version of a naked, chocolate caramel turtle layer cake. I didn't use the recipes over at Life Love and Sugar. Nope, the PICTURE was my inspiration for this cake.
Three layers of Devil's Food Chocolate cake are made from two cake mixes. The topping is my easy, three ingredient, fudgy chocolate glaze.
The filling: caramel butter cream frosting topped with chopped, mini chocolate pecan turtle candy, drizzled with caramel sauce and chocolate glaze. 
Fudgy Chocolate Glaze Recipe        Click Here