Tuesday, April 29, 2014

Mothers Day Tea Light Holders

Glitter salt dough, cookie cutters, and tea lights are all you
need to make this easy and economical craft for Mothers Day. 
Old fashioned salt dough can be updated with the simple addition of Wilton gel food colors and glitter. I was visiting The Imagination Tree looking for a Mothers Day craft for church when I saw Anna's post for Rainbow Glitter Salt Dough. Wow, why didn't I think of this? Anyway, I knew I wanted to have the kiddos make a tea light for mom using this great salt dough idea. Read on to see the basic recipe and directions.


The basic recipe for one pound of salt dough is:

1 cup of flour
1/2 cup of salt
1/2 cup of warm water
2 1/2 - 3 tablespoons of glitter
a small amount of Wilton gel food coloring in the desired color

Extra Item 

1 can of clear spray paint

Salt Dough Directions


  • Place the flour, salt, and glitter in a bowl.
  • Stir until well blended.
  • Add the warm water
  • Stir with a sturdy spoon until the dough begins to cling together.
  • Knead the dough by hand until it forms a ball.
  • If the dough is sticky, add a small amount of flour to the bowl and knead it into the dough.
  • Continue to do this until the dough is no longer sticky.
  • Divide dough into four balls.
  • Flatten the balls slightly and add desired amount of gel food coloring to each ball.
  • Fold the dough over on itself and knead the color into the dough.
  • This makes four 1/4 pound balls, or enough to make 8 - three or four inch tea light holders.

Tea Light Directions


  • Begin with a two ounce ball of one color. (Slightly larger than a golf ball)
  • I flattened the ball into a disc that was a little larger than the cookie cutter I wanted to use.
  • Then I added designs with two contrasting colors before cutting the dough into the desired shape with a cookie cutter. 
  • Center a tea light over the dough and press it into the dough.
  • Wiggle gently until a well is created for the tea light to sit in. Remove the tea light.
  • Bake at 200 to 250 degrees Fahrenheit for two to three hours.
  • Let tea lights cool.
  • Spray a light coat of clear paint onto the tea lights to help keep the glitter from "shedding". 
  • Your beautiful tea lights are finished.
For a look at painted holders go on over to Life as a Mom and see Janel's tutorial.


Sunday, April 27, 2014

Low Fat Oatmeal Raisin Muffins


 Unsweetened applesauce is the secret ingredient that makes my muffins moist and low in fat. For healthier muffins and cakes, you can substitute unsweetened applesauce for up to half of the oil that most recipes call for. Canola oil is a heart healthy oil. Canola oil  is what I keep on the pantry shelf for baking up some homemade,and heart healthy, happiness on a plate.


Low Fat Oatmeal Raisin Muffins Recipe

Yield - one dozen muffins

Ingredients

  • 1 egg    
  • 3/4 cup of milk  
  • 1/2 cup raisins   
  • 1/4 cup unsweetened applesauce    
  • 1/4 cup canola oil 
  • 1 cup flour  
  • 1 cup quick oatmeal     
  • 1/2 teaspoon nutmeg  
  • 1/4 teaspoon cinnamon  
  • 1/3 cup sugar
  • 3 teaspoons baking powder  
  • 1/2 teaspoon salt
  • 12 cupcake liners

Directions

  • Preheat your oven to 400 degrees Fahrenheit Using an oven thermometer is a great idea for knowing the exact temperature of your oven. My oven does not regulate well. It is usually twenty-five degrees hotter than the temperature I set it for!
  • Place cupcake liners in the cups of a regular size cupcake pan.
  • Crack egg into a medium size bowl and beat until white and yolk is combined.
  • Add milk, applesauce, and canola oil to the beaten egg and stir.
  • Add remaining ingredients and stir just until all ingredients are blended. Lumps are okay.
  • Place about one and a half tablespoons of batter into each cupcake liner. 
  • Bake for 20 minutes, or until golden brown.
  • Remove pan of muffins from the oven.
  • Put the pan on a cooling rack and cool the muffins.
Your muffins are ready to enjoy!


Saturday, April 26, 2014

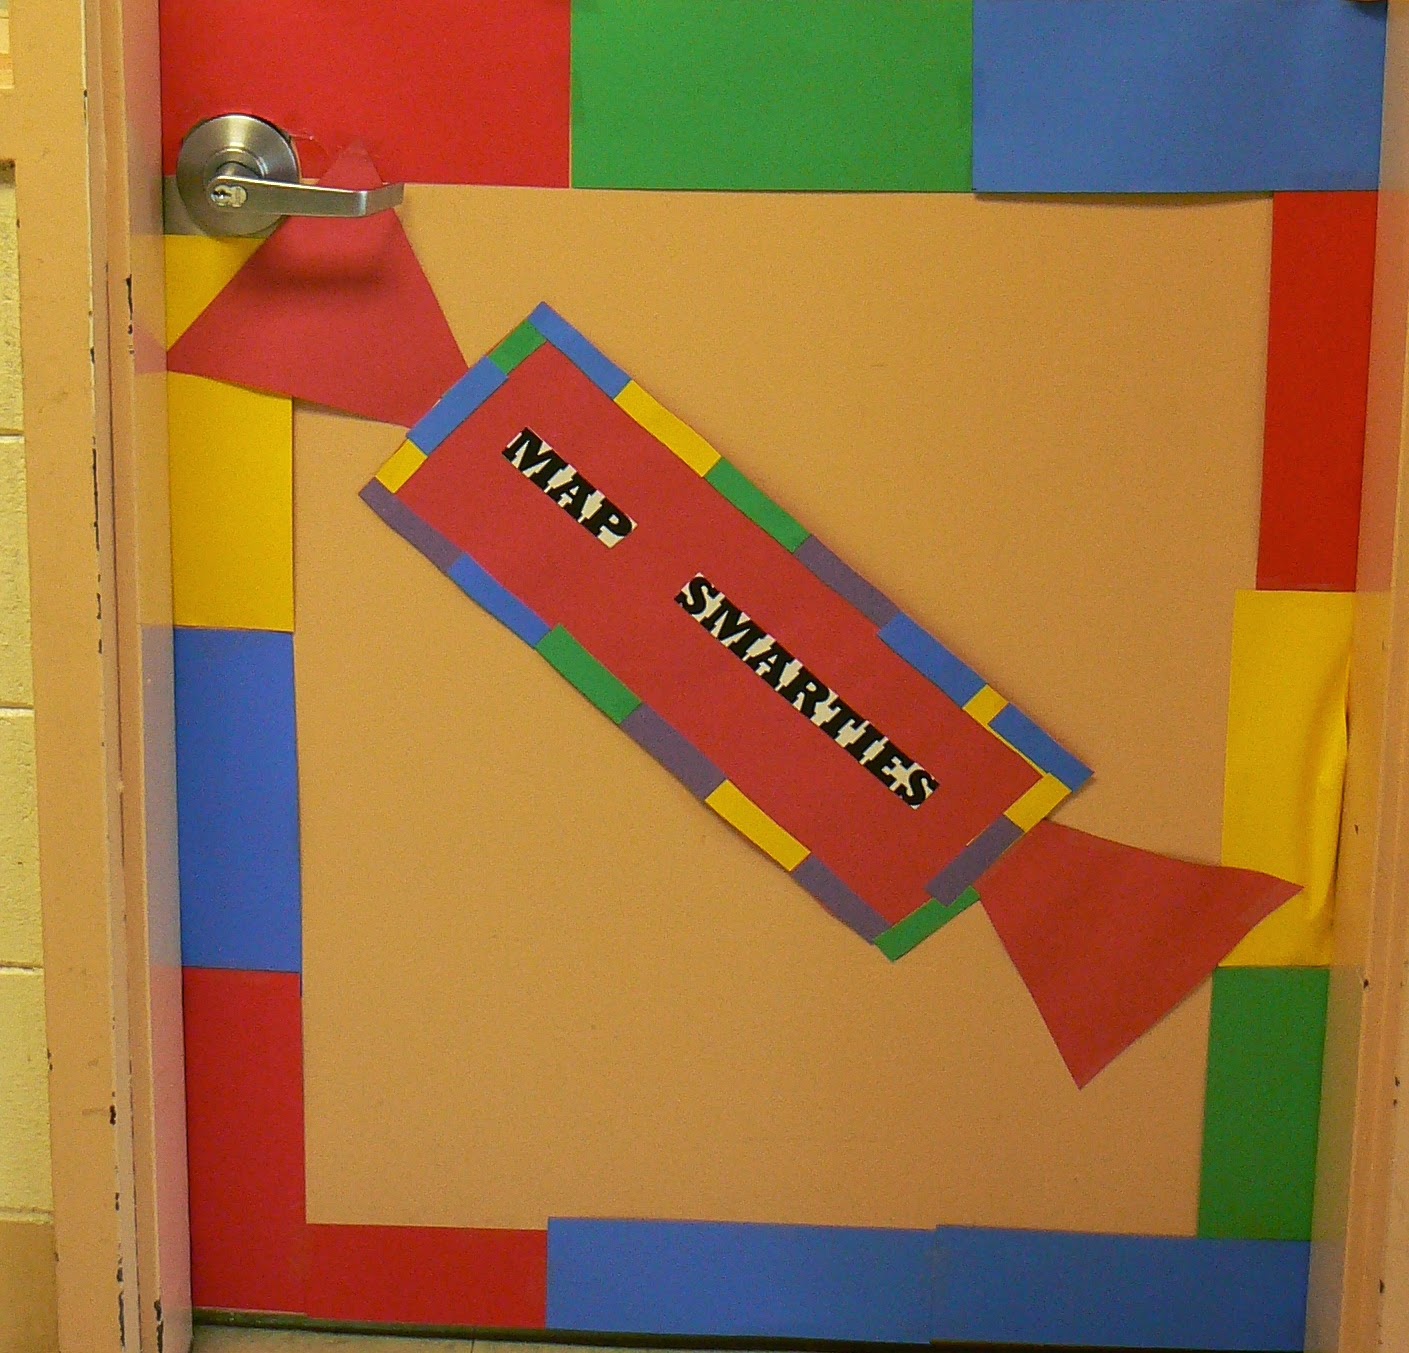
A Candy Themed, Classroom Door Decorating Contest


Success is Sweet! 

Isn't that a great theme? The students and teachers at our elementary school jumped onto the "Success is Sweet" theme for the state assessment test with loads of enthusiasm. I wanted to share the highly successful door decorating contest with you.

Incentives for the Door Decorating Contest

The first, second, and third place incentives were:
First place - an extra recess for one week, the classroom teacher can wear blue jeans for a week.
Second place - an extra recess for three days, the classroom teacher can wear blue jeans for three days
Third place - an extra recess for two day, the classroom teacher can wear blue jeans for two days
Can you guess what candy this is?


Candy Theme Assessment Bulletin Board


A candy-themed bulletin board for yearly state testing. The slogans 
read,"Make a commit "mint" to test your best!" and "Be a Maries R-1
Smartie!" Two pieces of mint candy and two Smarties surround the words, mint and Smartie.
  • Bulletin board background is made of two, plastic tablecloths from the dollar store, one orange and one yellow.

Steps to Make Background Stripes

1. Shake the table cloths out and fold each one in half horizontally. (hamburger fold)
2.  Cut along the fold. You now have four pieces of tablecloth, two orange and two yellow.
3. Fold each piece of tablecloth in half vertically. (hot dog fold)
4.  Staple the strips of plastic tablecloth to the bulletin board,  layer to achieve uneven stripes.


  • Year numerals were achieved by setting the font at 400 pt. Layer two sheets of 8.5" x 11" construction paper under each number and tape in place with scotch tape. 
  • The slogans were made by setting the font at 200 - 250 pt. font, typing the slogans and printing the out. I cut 3" strips from construction paper, cut the slogan words out, and glued the words to each strip with a glue stick.
  • All of the students in 3rd grade signed around the number two, 4th grade students signed around the zero, 5th and 6th grade students signed around the number one and number four.

  • The butter scotch "candy" is made by placing two paper plates together, securing with tape, and wrapping with cellophane.
  •  The mint "candy" was achieved by drawing and coloring red swirls on the back of each white paper plate.
  • Rectangular "candy" was made by wrapping cellophane around a plastic food container.

Monday, April 21, 2014

Easter or Spring Lamb Cake - A Three Generation Tradition

The 2014 Easter lamb cake surrounded by Easter egg malted
milk balls. Before serving, I tied a narrow, pink ribbon around
the lamb cake's neck.


The First and Second Generation Bakers

My Grandma Pansy made an Easter lamb cake for Easter Sunday when I was a little girl. Then, my mom bought a lamb cake pan and started making lamb cakes, too. Sometimes, the lamb cake was made for a special spring dinner. A family tradition was born from this beginning.

The Third Generation Baker

Today, I am the baker of Easter lamb cakes. I love making these cakes because it reminds me of the cakes Grandma Pansy and Mom made. When I posted this year's lamb cake picture on Facebook, my sisters, brothers, and scattered relatives all posted their memories about the Easter lamb cakes of Grandma Pansy and Mom. It is a family tradition that is still bringing us together.

The Cake

Grandma usually made a vanilla cake  and Mom made a pound cake. However, I prefer to make carrot cake. Mom would always fill the bottom half of the cake pan with batter. Next, she would place the top half onto the bottom, like a lid, and bake the cake. She had a one piece cake. I tried making a cake like this several times and the nose of the lamb was always incomplete. So, I make a two piece cake, front and back. 

I fill each half of the cake pan and bake according to the recipe directions. Each recipe usually includes how long to cool the cake in the pan. The usual amount of time is ten minutes. Once the cake is out of the pans and cooled to room temperature on the cooling rack, I put the halves in the freezer for about an hour. Then the cake halves are ready to be leveled. Leveling the cake involves cutting off the rounded top of each half so the two halves will fit together without gaps. The front of the lamb cake pan is a little thinner than the back, so I occasionally have two issues arise when I get ready to level the cake and assemble the two halves. The front ears are over baked or the front neck is a little weak. Both of these issues are easy to solve.
 
1. The front ears can be cut off and you only use the ears on the back half of the cake. This is what I did with this cake.
2. To add strength to the neck, I simply place a bamboo skewer through the center of the head and neck. After placing the skewer, pull it back out  just a little bit, and cut it off slightly below the cake line. Then push the skewer back into the cake and out of sight. 

Assembling the Cake Halves

Assembling the two halves is not difficult. Apply butter cream frosting to the leveled top of the lamb's back half. Set the lamb's front half on top and frost the seam area all way around. Place the cake into the refrigerator for about an hour, or until the frosting stiffens enough to hold the two halves in place. Set the cake upright on a plate, or platter, and frost with a base coat of frosting. Once the base coat is in place, you can either start piping on the top coat or refrigerate the cake and decorate later. 

The Decorations

Mom and Grandma Pansy would decorate their cakes with butter cream frosting, apply white, shredded coconut, and use black jelly beans for the eyes and nose. However, I love frosting my lamb cakes with butter cream frosting and a decorative pastry tip. Sometimes I use a large star tip and other times I use a large drop flower tip. Just experiment and find the tip that appeals to you.

My eyes are made out of a mini marshmallow and two chocolate chips. Cut the mini marshmallow in half and flatten each half slightly. Place a chocolate chip into the center of the sticky cut side of each half. Press the marshmallow round into the frosting on the lamb face. The nose is one chocolate chip.

Another detail that varies from year to year, is what I surround the lamb cake with. I have used green tinted, shredded coconut, frosted tulip cookies, frosted daisy cookies, foil wrapped chocolate eggs, and malted milk ball eggs.


The Tucker family traditional lamb cake pan.

Top half is the front of the lamb.
Bottom half is the back of the lamb.
The two cake pan halves are greased , floured, and awaiting batter.

Before setting the cake upright, I use butter cream frosting
 to "glue" the two halves together and to seal the seam
 between the two halves. After about an hour, the cake can be 
placed upright and a base coat of frosting applied. 
.

Slightly visible seam between the two cake halves. The front set 
of ears are cut off and the base coat covers the cut.

Back view of the lamb cake with the base coat of frosting.

Monday, April 14, 2014

Peach Crisp - An Easy to Prepare Recipe


I decided to make peach crisp for the first time. The recipe I used was from an older Betty Crocker cookbook. The peach crisp was easy to assemble and bake. However, the amount of cinnamon and nutmeg the recipe calls for is too much for me. I finished eating the peach crisp an hour ago and my mouth is still warm and tingly from the two spices. I adjusted the amount of cinnamon and nutmeg in the recipe.


Peach Crisp Recipe


Ingredients


  • 29 ounce can of sliced peaches, drained
  • 2/3 cup packed brown sugar
  • 1/2 cup all purpose flour
  • 1/2 cup quick oatmeal
  • 1/2 teaspoon ground cinnamon 
  • 1/4 teaspoon ground nutmeg
  • 1/3 cup light margarine, softened


Directions 


  • Preheat your oven to 375 degrees Fahrenheit. 
  • Arrange the peach slices in a greased, 8 inch, square pan.
  • Place the remaining ingredients in a bowl and mix well.

  • Sprinkle the topping over the peach slices.
  • Place the pan in the oven and bake for about 30 minutes, or until the topping is golden brown.
  • Serve warm. If desired, serve with vanilla ice cream or whipped topping.


Yield: 4-6 servings

Friday, April 11, 2014

Cake Walk Cupcakes

Spring bake sales and fundraisers have arrived! Last night I baked cupcakes for the school carnival after working all day. Working all day and making cupcakes by night means I used store bought cake mix and frosting. Sometimes, it is just easier to open a box.

To create my quick and easy cupcakes I used the following items:


  • one box of white cake mix
  • one box of devil's food chocolate cake mix
  • one container of lemon frosting
  • one container of strawberry cream frosting
  • Silver foil cupcake liners will also add extra eye appeal.


Directions

Note: I only made two dozen cupcakes, but I had enough extra batter that I made an 8", marbled cake that I put into the freezer for another day.


  • Place foil liners into two, one dozen, cupcake pans.
  • Follow cake mix package directions and make one bowl of white cake batter and one bowl of chocolate cake batter. I use two whole eggs with white cake mixes.  
  • Place about 1/3 cup of batter into each cupcake liner.
  • Bake as directed on the package.
  • Cool and frost as desired. 


White cupcakes with lemon frosting. Notice the plastic clamshell package? No, I did not buy it. The package was recycled by washing it in hot, soapy water and drying by hand. The packaging looks as good as new! After all, it only held cupcakes one time before.

I filled a pastry bag with frosting, snipped the end off, and piped coils around the cupcakes.
Then, I applied sprinkles! See the foil liners? Using silver foil liners is an EASY way to
create extra eye appeal.

Devil's food chocolate with strawberry frosting. I piped the frosting on using a #194 tip. I love the hydrangea effect.

Wednesday, April 9, 2014

Strawberry Bacon Breakfast Sliders

Yield: about 9 sliders


Ingredients
Silver dollar size pancakes
Strawberry preserves, warmed
Baked bacon, about 12 oz.
Butter (optional)
For each slider:
  • Take two pancakes and lightly butter one side of each pancake. You can omit the butter if you wish.
  • Place about 1 teaspoon warm strawberry preserves on a pancake 
  • place desired amount of bacon on top of the preserves
  • top with the second pancake, butter side toward bacon.

To prepare the bacon:

  • Put the bacon slices in a baking pan.
  • Bake at 375 degrees for about 20-25 minutes, or until golden brown and crispy. 
  • Turn bacon slices after about 10 minutes.  
  • Drain on paper towels before using.

My Pantry Style Pancake Recipe

Ingredients
  • 1 cup all purpose flour
  • 1 Tbsp. sugar
  • 3 teaspoons baking powder
  • 1/2 teaspoon salt
  • 1 egg
  • 3/4 cup of milk
  • 2 Tbsp. canola oil
  • Canola oil cooking spray
Directions
  • Place dry ingredients in a bowl. 
  • Use a wire whisk and blend the dry ingredients until well blended.
  • Add the egg, milk, and canola oil.
  • Stir with the whisk until well blended.
  • If the batter is too thick, add 1/4 cup water or milk.
  • Lightly coat a hot nonstick skillet with the canola oil cooking spay.
  • Use one tablespoon of batter for each pancake. I make 6 or 7 at a time.
  • Cook pancakes until bubbly and slightly dry around the edges.
  • Turn and cook other side until golden brown.

Yield: about 18 small pancakes.