Wednesday, May 28, 2014

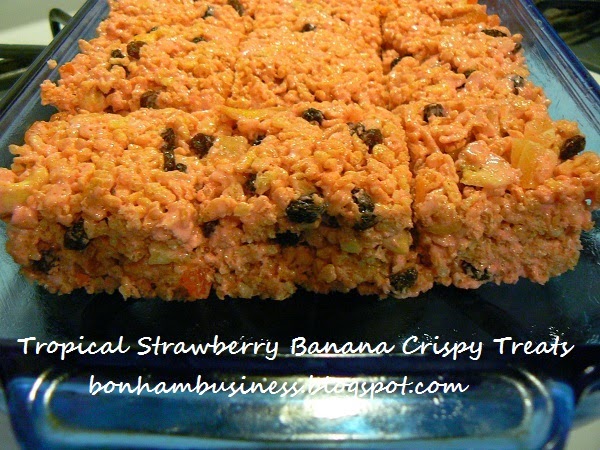
Tropical Strawberry Banana Crispy Treats

This is my third original recipe for crispy treats. My family ate the initial test batch and declared them to be good. I hope you enjoy your first batch of Tropical Strawberry Banana Crispy Treats, too!

If you enjoy the Tropical Strawberry Banana recipe, try my  Strawberry Chocolate Cereal Hearts recipe, or Crispy Chocolate Mint Shamrock Treats recipe.

Enjoy some homemade happiness on a plate today!


Ingredients
Sugar Free Strawberry Banana Jello                  
10 oz. bag Tropical Trail Mix        
10-16 oz. bag marshmallows                
4 Tbsp.of salted butter  
1 Tbsp. corn syrup                    
6 cups rice cereal

Tropical Trail Mix can be found at your local dollar store.
 The mix contains raisins, banana chips, papaya, pineapple,
cashews, and apricot.
Directions
  • Place butter and 1 Tbsp. corn syrup in a large, microwaveable bowl and microwave for 30 second. 
  • Stir once or twice.
  • Microwave for an additional 15 seconds, or until the butter is melted.
  • Remove bowl from the microwave. Add marshmallows to the bowl and stir until the marshmallows are coated with the butter and corn syrup mixture.
  • Place the bowl of coated marshmallows in the microwave.
  • Microwave for 30 seconds. Stir mixture once or twice.
  • Repeat this step twice, or until the marshmallows are melted.

    Marshmallows coated with corn syrup and butter.

  • Add the packet of dry jello. Stir until mixed well and the mixture is uniformly pink. You will still see very small flecks of pink jello, but that is okay.

Melted marshmallow/strawberry banana jello mixture. Add rice cereal and tropical fruit mix.


  Stir until marshmallow mixture is well blended with cereal and 
tropical fruit. I would recommend breaking the banana chips into
 smaller pieces, or use a dried fruit mix without the chips.
  • Place the blended mixture into a buttered, rectangular, casserole dish.
  • Press the mixture lightly into the pan with buttered hands.
  • Butter a knife and slice into 12 large, or 24 small portions.
  • Let the treats sit for about an hour, or until the marshmallow mixture is no longer sticky.
  • Your treats are ready to eat!


Place mixture in a buttered casserole pan.
I used a 2 quart baking pan (8 x 11.5 x 2) and sliced the treats into
12 large portions. You can also slice into 24 small portions.
The mixture is sticky so I buttered my knife before slicing.


Wednesday, May 21, 2014

Almond, Nut and Chocolate Popcorn Mix


I have been pinning popcorn mix recipes for months.  After reading so many recipes, I began developing three popcorn mix recipes of my own.

This week, I am sharing my first, Sallee Bonham original recipe.

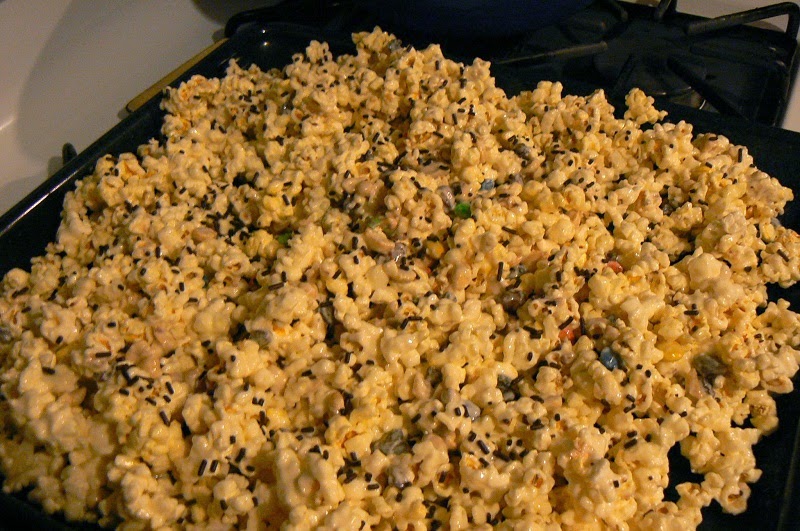
My first original popcorn mix is going to be made with three ingredients: a packaged nut and chocolate mix from the local dollar store, vanilla almond bark, and fat free microwave popcorn. An optional, fourth ingredient is sprinkles or decors. I chose to use chocolate sprinkles with today's batch of popcorn mix.

What a great bag and go snack! OR sell it at your next bake sale! OR give it to dad on Father's Day! OR wow your coworkers with something sweet to eat!

Update 5/28/2014

I took five sandwich bags of popcorn mix with us on our Memorial Day camping trip. The bags were in the cooler during the trip. After arriving at our destination, I removed the bags from the cooler and kept them in a shady corner of the tent. Bill would open a bag of the popcorn mix with every intention of only eating a handful or two, but found that the sweet mix was highly addictive. He just couldn't stop until the bag was empty! On Saturday morning, I decided to indulge by eating popcorn mix for breakfast. After all, isn't it a lot like eating doughnuts for breakfast? Ahh...the camping breakfast of my dreams...a cup of strong, black coffee accompanied by  almond, nut and chocolate popcorn mix.


Ingredients

Yields about 10 cups of popcorn mix for a total cost of $5.46

  1. 1 - 10 oz. bag of Nut and Chocolate Mix                                                                                
  2. 2 - 2.75 oz. bags of  94% Fat Free Microwave Popcorn, popped (about 10 cups)                 
  3. 24 oz. of Vanilla Almond Bark                                                                                               
  4.  sprinkles or decors, optional


Directions

  • Place popped popcorn in a very large bowl or container. Keeping the unpopped pieces out of the bowl was the biggest challenge I had with this part.
  • Pour Nut and Chocolate Mix on top of the cool popcorn.
  • Break the vanilla almond bark into cubes and place the cubes in a 6 cup microwaveable bowl
  • Microwave for 90 seconds and stir. My almond bark was melted at this point. If yours is not, microwave an additional 15 seconds. Repeat if necessary.
  • Slowly pour a thin stream of vanilla bark over the popcorn. Stop and stir gently.
  • Repeat until all of the vanilla bark is gone. This only takes about 4-5 minutes.
  • Pour the coated popcorn mix into a shallow pan and spread out.
    Shake sprinkles over the mixture 

  • Place the pan in the freezer for 5 minutes.
  • Remove the hardened mix from the freezer
  • Gently break the mix into small pieces and place in a large bowl.


Time to eat your homemade and delicious popcorn mix!


Saturday, May 17, 2014

Cookin' Up Caramel Candy with Sallee B.

I have been meaning to get the recipe for caramel candy to you this week, but it is the last week of school. By the time I get home, I am wiped out! Thank goodness today is Saturday. I actually slept til six. Doesn't sound like I slept in, but the fur babies don't know today is Saturday. All three of them were ready for Mom to get up and let them go outside to the fenced in backyard. Love my fur babies! Now let's get back to cooking caramel candy.


This recipe is from my Grandma Pansy's "The American Woman's Cook Book". What I like about the recipe is that it doesn't use cream. You use evaporated milk and homogenized milk.


VANILLA CARAMELS

Yield: about 1 pound.

Ingredients


2 cups sugar
1/2 cup corn syrup
1/2 cup milk
1 tsp. vanilla
4 Tbsp. butter
1 cup evaporated milk

Directions


  • Place sugar, corn syrup, milk, butter, and evaporated milk into a heavy pan.
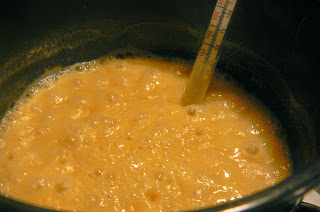
  • Cook the ingredients to the stiff ball stage, or 246 degrees F. I kept my gas stove on medium low, #3 - #4 on the knob.
  • Remove from the fire,
  • Add the vanilla and stir it in. I used imitation vanilla extract and the caramel was heavenly.
  • Pour the caramel into a buttered pan. 
  • When it is cold, turn it out of the pan and cut it into squares.
  • Wrap squares in wax paper and store in a covered container.

Tuesday, May 13, 2014

Caramel Chocolate Turtle Cake

Since I am a chocoholic, I used a trio of chocolate flavors: devil's food chocolate cake, milk chocolate chips, and semi-sweet chocolate chips.
Then, I layered and topped the cake with this luscious, buttery, and velvety smooth caramel sauce.
 Nut allergies are a  concern for many people when they eat a dessert, but not with this cake. The turtle cake is nut-free. However, nut lovers will not miss the pecans while eating this triple chocolate, caramel smothered cake.

After I made this cake, I carried it to work with me so my coworkers could taste test it. My coworkers fell in love with the caramel topping and were very surprised to find out that the caramel was home made. Some of the compliments the cake was given were: fantastic, amazing, awesome, addictive, and rich.
Craving a taste of some homemade happiness on a plate? Try making
my version of a Caramel Chocolate Turtle cake.
P.S.  I had to use my serrated bread knife to neatly slice through the caramel on top of the cake. 

Cake Ingredients

1 box devil's food chocolate cake mix
1 cup water
1/3 cup oil
3 eggs
1  cup milk chocolate chips
1/2 cup of semi-sweet chocolate chips
1 batch of caramel sauce

Caramel Ingredients

2 cups sugar
1/2 cup corn syrup
1/2 cup milk
1 1/2 cup evaporated milk
1 tsp. vanilla extract
4 Tbsp. butter
Golden brown, luscious caramel sauce ready to use.

Caramel Directions

  • Place all ingredients, except the vanilla extract, into a large pan.
  • Cook over medium low heat. (#3 on my gas range) Do not be tempted to turn the heat up. My first batch scorched because I got impatient and turned the heat up. 
  • Stir constantly until mixture begins simmer.
  • Stir occasionally with a whisk.
  • Cook to 225 degrees Fahrenheit
  • Watch closely and stir until mixture is thick and golden brown.  


  • Remove from the heat.
  • Add 1 tsp. of vanilla
  • Stir until well blended.
  • Keep warm. I put mine on top of my stove where the oven can keep it warm.

Cake Directions

  • Heat oven to 350°F.
  • Butter the bottom and sides of a 10.5 inch spring form pan. 
  • Dust with cocoa powder.
  • Make cake batter as directed on box.
  • Pour half of the batter into pan.
  • Bake 15 - 22 minutes. 
  • Remove from oven.
  • Pour a little more than half the caramel mixture over the warm cake in the pan.
  • Sprinkle with the milk chocolate chips.
  • Spread with remaining cake batter.
  • Bake 25 to 28 minutes or until cake springs back when lightly touched. At 28 minutes my cake still wasn't quite done in the middle. I added another 3 minutes to the cooking time.
  • Run knife around sides of pan to loosen cake. I had trouble getting a butter knife around the edge of the cake. My darn eyes and hands didn't work together and I accidentally cut into the cake edge. 
  • Cool at least 30 minutes.
  • Remove spring form pan from the cake.
  • Place on a plate.
  • Drizzle with caramel sauce and semi-sweet chocolate chips.
  • Store loosely covered. Update: Okay I tried loosely covering my cake and everything stuck to the caramel I topped the cake with. I ended up using a large, plastic salad bowl as a cake cover and taped it to the cake platter to transport the cake to work. 
         
After cleaning my spring form pan, I realized that lining the pan with parchment paper would have been a better way to get this cake out of the pan.
Also, parchment paper would prevent the batter from creeping into the tiny gap between the bottom and sides of the pan. 

Tuesday, May 6, 2014

The Motorcycles Are Out of the Garage!

Mid-Missouri is having a heat wave! Finally, we can get the motorcycles out of the garage! Last Saturday, Bill and I rode with about twenty-five or thirty of our Christian Motorcyclists Association brothers and sisters. Our group consisted of eighteen motorcycles and trikes, plus one car. 
Your red headed blogger and hubby Bill (on my right) getting ready to pray before  we start our trip.
The Arcadia Valley eatery, Baylee Jo's BBQ and Seafood, is our lunch destination.


Leaving Belgrade, MO. See the car? I am slightly below and to the right of the car. Bill is directly ahead of me. The blue motorcycle in the bottom left corner belongs to my parents. Yep, my folks are in their seventies and riding a motorcycle.


Riding down the highway,  headed for the junction of Old Route C and Hwy. 21 South. We are between Potosi, MO and Caledonia, MO.

What a gorgeous trip! Now you know that I temporarily deserted my cooking and baking endeavors in favor of traveling the open road. However, I will resume posting in a week. Yesterday, I went shopping for the ingredients to make a Chocolate Turtle Cake. Look for my next post after Mother's Day.