Showing posts with label spring. Show all posts

Monday, March 14, 2016

A Spring Bunny Cake

My daughter gave me a mini-rabbit cake pan and today was the day to bake a bunny cake with it.
I used a box of strawberry cake mix and followed the package directions. One box of cake mix made enough cake batter for one bunny cake and five standard cupcakes.
Baking Times
bunny cake: about 25-30 minutes
5 cupcakes: about 12 minutes
  • After cooling the cake completely on a baking rack, apply a thin base coat of frosting. Make sure to fill in any gaps between the cake and cake plate. 
  • Put the cake in the freezer compartment of your refrigerator until the base coat is completely firm.

Decorator Tips
white bunny fur - #177 drop flower tip
pink accents - #16 open star tip
eye center - upside down chocolate chips

Remove the cake from the freezer and frost in the following order:
  1. outline and fill in the pink ear centers.
  2. pipe the nose and mouth
  3. make two pink circles for the eyes
  4. pipe on the fur over the entire cake
  5. apply upside down chocolate chips for pupil of eyes
  6. pipe eyelashes and whiskers. 
Your spring bunny cake is now ready to present to your family.

Amazon.com sells similar cake pans for under $10. Now you can make a bunny cake too!


Saturday, April 20, 2013

Multi Month Spring Bulletin Board


Multi Month Spring Bulletin Board


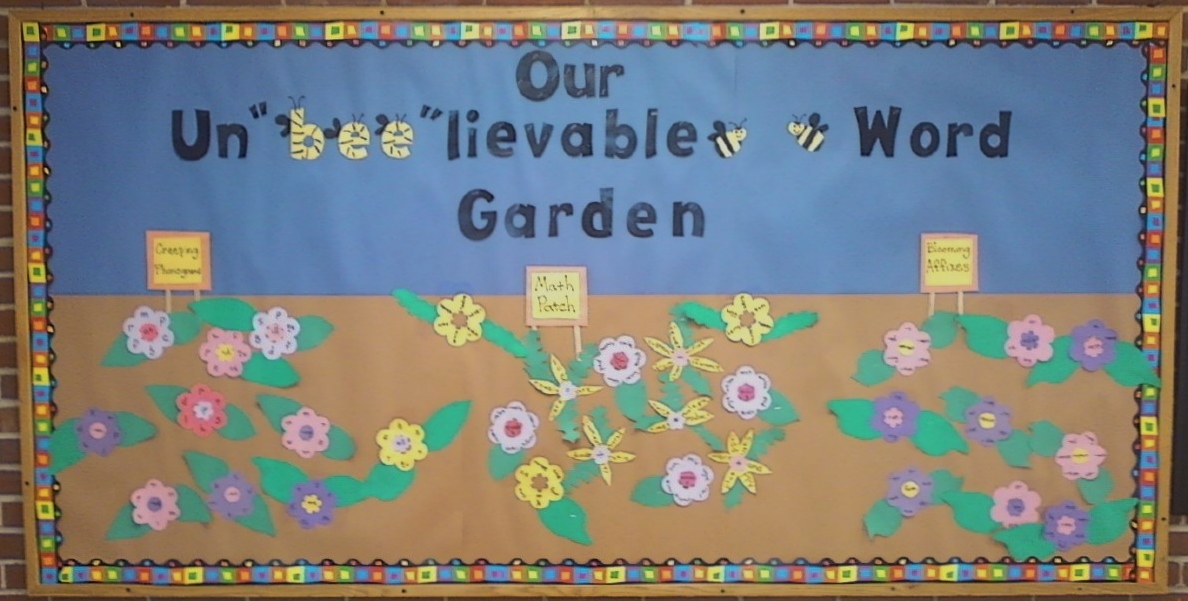
After searching for a spring bulletin board that would last from March to May, I decided to combine two different ideas, bees and a word garden, to create my own spring bulletin board. The monthly ideas for taking the bulletin board from March to May are listed below. Add your decorations to the open areas and you will have your own multi month bulletin board.

·         March - green shamrocks

·         April - Easter eggs and/or daffodils

·         May -  Larger word flowers with larger leaves
 

Materials for Basic Bulletin Board

  •  brown and blue paper for the background - I used three extra large sheets of construction paper in each color.
  • 3" AccuCut flower die
  • Construction paper in desired colors for flowers.
  • Fine point black marker
  • 6 craft sticks
  • bulletin board trim in desired pattern
  • tape
  • stapler
  • scissors, adult size
  • Precut black letters or use AccuCut dies and construction paper

Bulletin Board Title

Our Un"bee"lievable Word Garden was made using purchased, precut black letters and AccuCut yellow construction paper for the "bee" letters. I did not use a pattern for the wings or bees. I drew the wing shape onto black construction paper with a pencil and then cut them out with scissors. I made the bumble bees by folding a square of yellow paper in half and cutting out a small circle, then a larger oval. The bumble bee stripes, letter stripes, and bee faces were drawn with a fine point black marker.The antennae are drawn on after placing the bumble bees and letters on the bulletin board.

.


 Word Garden Signs

The signs are constructed of orange squares and slightly smaller yellow squares that matched the border. I made tape rolls and taped the yellow squares to the orange squares. Then I lettered the signs, Creeping Phonograms, Blooming Affixes, and Math Patch. I used a stapler to staple the craft sticks onto the finished signs and then onto the bulletin board.


Flower Construction

I used an AccuCut die for most of the flowers.  I did not use a pattern for the leaves, instead I took a standard size sheet of colored copy paper and folded it in half twice. Using scissors, I cut out a leaf shape. The quarter folded sheet of paper yielded 4 leaves and I made three leaf shapes.

The Math Patch thin, yellow flower petals were cut out around the math words that I printed onto yellow paper first.
    Various types of flowers with math vocabulary and the prefixes mono, bi, tri, and quad. 
     
     
    The phonograms were chosen from The Reading Teacher's Book of Lists 


Monday, April 15, 2013

5 Easy to Grow Mosquito-Repelling Plants | Eartheasy Blog

5 Easy to Grow Mosquito-Repelling Plants | Eartheasy Blog

Spring is here and its time to think about outdoor entertainment. Wouldn't it be nice to have plants that look great and repel mosquitos at the same time?

Sunday, March 24, 2013

That Darn Groundhog was Wrong!

My dad posted a picture on my Facebook page that showed a dead groundhog supposedly holding a pistol in its paw with this caption,"Punxsutawney Phil, the King of the Groundhogs was found dead from an apparent self-inflicted gunshot wound after predicting an early spring." Don't get mad at my dad! In the words of Larry the Cable Guy," Now that there's funny!"

Yesterday morning (Saturday) I started pruning, watering, and rearranging my houseplants around the house. A sure sign that I have spring fever. The groundhog didn't see his shadow, the first day of spring has come and gone, and daffodils are blooming. WHY am I seeing snow this morning? I know, writing this isn't going to change a thing BUT it always makes me feel better.

So here's my variation of "If life gives you lemons, make lemonade."

 If life gives you snow, make snow ice cream.

March 24, 2013
Really Phil? Really?
 

Wednesday, February 27, 2013

Spring Baking Fever is Upon Me!

I am ready for SPRING!
The south western slopes of central Missouri have sprouted daffodils. Last week some of daffodils even had yellow buds showing. Unfortunately, the two winter storms we have had also coated them with ice and snow. BUT I am still in the early stages of spring baking fever, all it took was that glimpse of yellow buds. St. Patrick's Day is right around the corner and this year Easter is March 31st. I've been thinking about decorating cookies for the two holidays.

 Shamrocks are easy to make with a small heart cookie cutter. Take three small hearts and arrange them as shown below or you can slightly overlap the hearts. Cut a stem from the dough and add it to the hearts. Instant shamrocks! One year I made three 9" heart cakes and arranged them in this way. The stem was a Twinkie that was frosted in green icing with a star tip like the cakes.

Easter will be celebrated with a lamb cake and Easter Egg sugar cookies. Flow icing is a technique that I have been practicing with since last November. I tried it on some Christmas tree cookies with butter cream frosting and it worked pretty well. Last month I found a tutorial, on YouTube, for outlining and filling in cookies with royal icing.  I experimented with making and using royal icing on the Valentine cookies and was really pleased with the end result. My brain is already dancing around ideas for the Easter Egg cookies!