Showing posts with label bouquet. Show all posts

Saturday, November 19, 2016

Baby Floral Celebration Cupcakes


A coworker is having her second baby. 
After her family reveal party on a Friday night,  I made two dozen celebration cupcakes to take to work on Monday morning. As you can see, Baby Number 2 is a girl!

Start with two dozen of your favorite cupcakes and a batch of your favorite butter cream frosting. 
Divide the frosting into small bowls and tint the desired colors. I used Wilton and Americolor gel food coloring in the following combinations:
  1. pink with a touch of burgundy - blossoms
  2. lemon yellow with a touch of copper - flower centers and blossoms
  3. lemon yellow with a touch of red - orange blossoms
  4. leaf green with a tiny touch of brown - greenery

Note: I used two colors in my pastry bag for the blooms and kept reloading the same bag with frosting.
Decorating Tips Used
1. Wilton 2D tip for the butter cream flowers
2. #5 piping tip for the yellow flower centers
3. #68 leaf tip for the greenery
4. #3 piping tip for writing the "Baby" topper

Steps for Frosting the Cupcakes with Butter Cream Frosting
  1. Using the #68 leaf tip and green frosting, pipe a band of greenery around the outside edge of each cupcake. Note: It is not necessary to frost the cupcakes with a base coat of frosting. I piped the blooms directly onto the bare cupcake tops that were edged with the band of greenery. 
  2. Using the 2D tip and two colors of frosting, cover the top of each cupcake with flowers. To create height, slightly overlap some of the blooms, and in the center of the cupcakes, pipe a bloom or two over the first layer of blooms. 
  3. Fill in gaps between the flowers with the leaf tip and green frosting. 
  4. Using the #5 piping tip, place a small dot of yellow frosting into the center of each flower. 
  5. Carefully place the "Baby" cupcake topper onto each cupcake

How to Make the Baby Cupcake Topper

Ingredients
  • 3 - 4 blocks, or squares vanilla almond bark
  • 1 tsp. solid, vegetable shortening
  • tiny drop of red, gel food coloring
Directions
  • Melt almond bark in a microwave following the package directions.
  • Add a tsp of solid, vegetable shortening and stir into the melted almond bark until it is melted.
  • Add a tiny bit of red gel food coloring to tint the almond bark pink. 
  • Place a sheet of parchment paper onto two baking sheets.
  • Spoon the warm, tinted almond bark into a piping bag that has been fitted with a #3 piping tip.
  • Pipe the word Baby about 26-28 times onto the parchment paper covered baking sheets.Try to hold the tip slightly above the parchment paper as you pipe the word. 
  • Place the baking sheets into the freezer for about 10-15 minutes, or until you are ready to put them on top of the cupcakes. 
  • When completely cooled and solid, gently lift each word from the parchment paper and place carefully onto the frosted cupcakes. 

Sunday, July 10, 2016

Sallee's Cupcake Bouquets

Standard size cupcakes are decorated as flowers in these cupcake bouquets.
The hydrangeas were formed with a 2D decorator tip and the roses were formed with a 1M decorator tip.
Cupcake bouquet pictures have been catching my attention for a couple of years now. 
I have saved pictures of cupcake bouquets and read blog posts about cupcake bouquets. 

After watching several tutorial videos that show how to assemble a cupcake bouquet, I found that there are different ways to make a cupcake bouquet. 

Of course, I picked the easiest one!  

After volunteering to make four dozen cupcakes for a benefit dessert auction, I felt it was time to tackle this project.
The cupcakes are made from boxed cake mixes. Easy peasy, right?

I made devil's food chocolate cupcakes following the package directions.

Then, I used a little bit of cake mix magic with a white cake mix and made white lemon cupcakes. 

Want to know how to make white lemon cupcakes? The directions are underneath the next picture. 
To make a white lemon cake: Add 1/2 tsp. chopped lemon zest, and the juice of two large lemons, about 1/4 cup to a white cake mix. Also, use whole eggs. The light, fresh taste is perfect for summer!
Fresh strawberry butter cream is delish! About 6 large strawberries equals a half cup of strawberry puree. 
How To Make a Cupcake Bouquet Form
1. Staple seven, 5 ounce cups together (as seen in the above picture)
2. Cut a 14" to 16" square of tissue paper using zig zag scissors, paper edgers, or pinking shears.
3. Set the stapled cups in the center of the tissue paper square
4. Fasten the tissue paper in between the cups using packing tape, or hot glue. My cups are waxed paper and I used a hot glue gun. 
5. Repeat to make the number of bouquet forms you need. 

6. Place each form into a container of your choice. I used round, 8"aluminum pans.

However you are free to place the bouquet into any container the form will fit into. Baskets, small pails, or a flower bowl are some of the options you can use. 
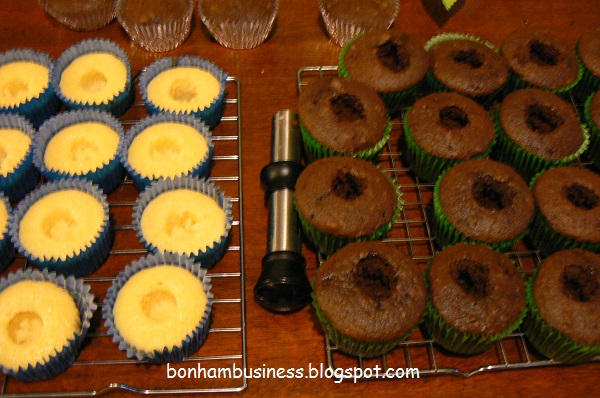
Cooled cupcakes ready to be filled with fresh strawberry butter cream. I use an apple corer to remove the center from cupcakes. 
To fill a cupcake
1. Put frosting in a pastry bag, snip the pastry bag tip, and squeeze the frosting into the center of each prepared cupcake. 
2. Start filling at the bottom and lift the bag as the frosting level rises. 
3. Place the filled cupcakes into a cupcake bouquet form.
You are ready to decorate!
Devil's food chocolate cupcakes with fresh strawberry butter cream hydrangea blossoms in place. 
Each hydrangea blossom received a dot of lemon yellow frosting with a #3 piping tip. 

The leaves were placed randomly using a #67 leaf tip. 
To make the roses, use a 1M tip. Start in the center of the cupcake and spiral outward. 
Fresh Strawberry Butter Cream Frosting 
 I filled 4 dozen standard cupcakes and frosted 2 dozen as hydrangeas with 1 batch of  this frosting. It makes a lot! 

Ingredients
  • 2 pound bag of powdered sugar
  • 1 stick of salted butter, at room temperature
  • 1 cup of regular vegetable shortening  Do not use pre-creamed shortening, it is too soft.
  • 1/2 cup of strawberry puree - about 6 large strawberries
  • 2-3 Tablespoons of cold water
Directions
  • Puree 6 large strawberries using a mini-food chopper, blender, or food processor
  • Pour the pureed strawberries into a measuring cup. You should have 1/2 cup of puree. If you have a little more or a little less, don't worry. It doesn't have to be exact. 
  • Place butter and vegetable shortening into a large mixing bowl
  • Beat the butter and shortening until they are blended and creamy, about 2-3 minutes
  • Add half of the powdered sugar, and 1 Tbsp of cold water
  • Beat at low speed until most of the sugar is blended with the butter/shortening mixture.
  • Add remaining sugar and the strawberry puree to the frosting.
  • Beat at low speed for 2-3 minutes, scraping sides of bowl once or twice. 
  • If you feel the frosting is too thick, you can add a Tablespoons of cold water and beat on low for a minute or two.  
Remember the frosting/filling will soften up a little from being at room temperature. You want it to hold its shape when you are piping flowers. 

For the roses I made a small batch of my butter cream frosting using the recipe below.

This is my favorite butter cream frosting!

Ingredients
  • 4 Tbsp of salted butter, at room temperature
  • 1/2 cup of vegetable shortening Do not use pre-creamed shortening.
  • 1/4 tsp. of vanilla extract
  • 1/4 tsp. raspberry extract
  • 1/4 cup of water
  • 1 lb. of confectioners sugar

Directions

  • Place butter and shortening in a mixing bowl.
  • Beat on low speed for 2-3 minutes
  • Add half of the powdered sugar and both extracts.
  • Beat on low speed until the sugar almost blended with the butter-shortening mixture
  • Add the remaining powdered sugar and the water.
  • Beat at low speed for 2-3 minutes, scraping sides of bowl once or twice. 
You will need to divide and tint your frosting the colors you want.


Saturday, August 3, 2013

Baby Shower Onesie and Bib Bouquet


I am so excited! My friend Gina sent me an invite to her daughter's baby shower. I have been wanting to make a floral baby bouquet with bibs and onesies ever since I saw a picture of baby boy bouquets on Pinterest. Today I went shopping for my version of the baby shower bouquet.

Shopping for a Gift Bouquet

At the dollar store I bought a four pack of bibs ($5), a three pack of onsies ($4), a swim noodle ($1), a card (.50), and a cute pink gift bag ($1.75). My next stop was a local thrift store, Crazy Lady's Resale Shop, where I purchased the white flower pot with a floral decal ($1.00). Total cost $13.25

Repurposed Materials

A pair of knit slacks provided the green fabric to cover the end of each "flower". The shreds were from wedding centerpieces I purchased at a yard sale and deconstructed for the ivy vases, shreds, flowers, and ribbons. The pink and white ribbons, bamboo skewers, and floral tape are from my craft boxes.

Assembling the Flowers

  • Each stem is wrapped in floral tape like the Spring Flower Bouquet I made for my mom. (PartyTimeBabyCom has a great Candy Bar Bouquet Tutorial that I adapted for my own bouquets.)
  •  Each flower is formed with a bib or onesie in size 3-6 months.
  • The green fabric around the bottom of each blossom was repurposed from a pair of knit slacks. Using pinking shears, I cut the hem off the bottom of one pant leg. Then I cut four, 1.5" horizontal strips from the pant leg forming pant leg loops. I cut the two seams off of each loop, which left me with two rectangles. I basted across the bottom of the wrong side and pulled the thread to form a circle. Then I stitched the two ends of the circle together. I slid the skewer end through the middle of the circle, pulled it over the base of the flower, and tied it in place with a piece of ribbon.


  • The original flower pot did not have a green rim. After sanding the brim with sandpaper, I dabbed leaf green paint onto the rim with a piece of scouring pad cut with pinking shears. (The narrow edge, not the flat, wide side.)
  • Once the paint was dry, I cut a piece of pool noodle to fit horizontally(sideways) across the bottom of the flower pot.
  • I placed shreds on top of the pool noodle piece, until the pot was full.
  • The last step in assembly was arranging the "flowers" in the flowerpot. I centered one of the onesie blooms, then placed the other two on either side of it. The bib blossoms filled in the space between.
  • Isn't the bouquet pretty? I am very happy with the end result of my work. I would be happy to answer any questions for your. Happy crafting!


Tuesday, July 23, 2013

A Vase Full of Summer Beauty

The white butterfly bush in front of my house is in full bloom this week. I've been sitting on the front porch glider in the mornings, watching butterflies and sipping coffee. Butterflies, moths, and humming birds hover over the horn shaped bloom clusters all day.
Purple and white wildflowers (blooming weeds) and white butterfly bush
Today, I decided to gather blooms from the butterfly bush, purple wildflowers, and white wildflowers. The wildflowers could be called weeds, but I prefer to think of the tall, woody stemmed plants as flowers. Scissors in hand, I strolled out to the field and cut about half a dozen blooms from each type of weedy plant. The summer heat was oppressive as I returned to the front porch with my floral bounty. The lower limbs of the butterfly bush quickly yielded eight large bloom clusters. Sitting on the glider, my next step was to relieve each stem of excess leaves before placing the stemmed flowers in my favorite pressed glass vase. The vase of summer beauties was so pretty that I had to share two pictures with you.


Monday, June 17, 2013

Balloon Flower Bouquet

A lovingly crafted bouquet for my dad, Richard.
An Original Sallee Bonham Creation

 During my photo browsing, I've seen several balloon wreaths and that fueled my idea for the balloon flowers in my candy bouquet. As far as I know, the balloon flower idea is an original Sallee Bonham creation because I haven't seen it posted on Etsy or Pinterest. 

 My mom received a candy bar bouquet from Bill and I on Mother's Day and I didn't want my dad feeling left out, so I created a Father's Day bouquet just for him. Dad appreciates a good cup of coffee and a piece of  hard candy, so the coffee candy was an easy choice. Likewise, the candy bars shown are his very favorite.


 Bouquet Items

20 party size balloons
bamboo skewers
16-18 fun size candy bars
1 small bag of hard candy
narrow ribbon of your choice
clear or invisible tape
4" or 5" container of your choice

Balloon Flowers

1. Skewer Stem 
  •  Cut to your desired length, tie four or five balloons around the middle of each "stem." I didn't measure these stems, I just "eyeballed it", but I did start with 10" skewers.
 2. Balloon Flower
  •  Cut the balloon stem off, snip a tiny hole in the top center of the balloon, repeat until you have the desired number of "flowers"
  • Slide a skewer "stem" through the snipped hole in the top of a balloon until it meets the tied balloons.
  • Tape a fun size candy bar above the balloon flower
  • Gently pull the balloon up and around the candy bar. Slide tied balloons on stem up or down until the balloon flower and the tied balloons meet and hide the bamboo.
  • Make a ribbon bow under your candy bar bloom. Trim ribbon to a length that pleases you.

Assembly

  •  Fill container with a random arrangement of candy bars and hard candy.
  • Place your ballon flowers as desired. I arranged the candy around the "stems" of each flower to hold them in place.
Happy Crafting!

Monday, May 13, 2013

Spring "Blooms" Candy Bar Bouquet


When I can construct a budget, friendly gift for someone to enjoy it is a win-win situation. I love to make economical gifts for my family and friends. Last time I made a candy bar bouquet, I finally remembered to take pictures as I worked.

Materials


Floral tape           12 inch or 10 inch bamboo skewers          green tissue paper          Invisible scotch tape      

3 packages of snack size candy bars (18 candy bars)         low-temp glue gun          glue sticks

Pinking shears or decorative scissors       4-inch ceramic pot           wired ribbon     

Filler for ceramic pot - I recycled pieces of styrofoam, but you can use floral foam, swim noodle pieces, etc. A batch of plastic wrapped rice crispy treats will even work!


Step 1 - Preparing Materials


·         Take 18 bamboo skewers and cut five to 6" length; five to 8" length; and eight to 10" length

·         Wrap skewers with floral tape. Start about 2" above the pointed end and wrap to blunt end.

·         Cut eighteen 1"x 1/2" rectangles from the green tissue paper. I didn't measure, I just estimated.

·         Cut eighteen 3"x3" squares from the green tissue paper. Again, I didn't measure, I just estimated.

Fill ceramic pot with filler. Stop about a 1/2 inch below the rim. (I like to place crumpled green tissue paper on top of the filler and poke the skewers through it.)

Step 2 - Assembling Your Candy Bar "Blooms"


  • Place a line of hot glue down the skewer from the blunt end. It should be about half the length of your candy bar. WAIT a couple of seconds, then place the skewer against the back of a candy bar. If you don't wait a couple of seconds, you could shrivel the candy bar wrapper, or melt the chocolate. Impatient? Then use tape, but the result won't be as cute, in my opinion.
  • Then, put a couple drops of glue on top of the skewer and place a green rectangle over it.
  • Continue until all eighteen skewers are done.
  • Poke a skewer through the center of a 3" tissue paper square. Then slide the square up to the candy bar. Gather the tissue paper gently around the skewer and tape it into place with invisible scotch tape.

Step 3 - Arranging Your Bouquet

  • Start with the 10" or 12" skewers and stick them into the pot, starting with one in the middle and space the rest evenly around the pot. I like my bouquets to be balanced and pretty from all sides. Just place and replace skewers until you're happy.
  •  After all the skewers are placed, arrange" leaves" and fill in any bare spots with more tissue paper.
  • Cut a length of wire ribbon; fold each end in half and clip diagonally from the fold to the open edges. Look at the picture to see your result.


Tips


·         Make your bouquets smaller or larger by using less or more candy bars. Smaller bouquets would need 4" skewers, 6" skewers, and 7" skewers. This will create a nice shape for your bouquet. Larger bouquets would need more 6" and 8" skewers.

·         Use raffia instead of ribbon.

·         Use full size bars for 6" - 8" pots.

·         Use scratcher tickets in place of the candy bars.

Inscription for a Card

Thanks for the mounds of love and all the joy you have given me. Your worth $100,000!


Thursday, January 17, 2013

Valentine's DIY Cookie Bouquet

Heart Cookie Bouquet


You don't have to web surf to find the perfect cookie bouquet recipe because I have found it for you. I have made some suggestions below on how to make it a little more frugal, but just as eye appealing.


Sallee's Notes
  • I have never used parchment paper when baking sugar cookies that have lots of butter in them. I let the cookies cool for two or three minutes, then move them to a cooling rack.
  • A set of graduated heart cookie cutters are very nice for this project. You can scatter 2 or three smaller heart cookies in your bouquet to give it more eye appeal.
  • Pastry bags just make life so much easier! Sandwich bags can be used, but I always end up with a blown out side seam and frosting oozing everywhere.So go ahead and purchase a pack of pastry bags and  a package of frosting couplers  in the craft aisle of your super discount store. Then you can have fun and make frosting tip changes quickly.   
  • A $1.25 will buy you a pack of 100 bamboo skewers instead of the white cookie sticks. I cut them to length with side cutter pliers or heavy duty kitchen shears. If they spinter just pull the loose piece off and everything will be fine.
  • Make a batch of krispy rice cereal treats and pack your mug with krispy rice treats instead of styrofoam. Line your mug with plastic wrap, pack it with your cereal treats, fold the excess plastic wrap over the top of the cereal. Don't pack the mug completely full or you won't have room for your paper crinkles.
  • Red, white, or pink ribbon of your choice so you can tie a pretty bow onto the coffee cup handle. Two years ago I bought a spool of white ribbon at a party store and I still haven't used it all up. So you can shop around and find spools of ribbon for under $6.
  • click here for the directions on how to bake and assemble a heart cookie bouquet.