Showing posts with label food presentation. Show all posts

Wednesday, June 21, 2017

Sallee's Six: July Pie Crust Designs


Use this technique with star cookie cutters for a 4th of July pie.
Pretty pies feed your eyes.
Just looking at pictures of gorgeous pie crust designs makes me want to get my rolling pin and bake a pie or two.

Listed below are five sources for pie recipes and pretty pie crust designs that I like.
Not a pie lover? Look at number 6.

  1. MarthaStewart.com has 12 piecrust designs to share with you.                           Click Here
  2. Sally over at Sally's Baking Addiction not only has an American Flag piecrust, but the pie has a blue fruit filling and a red fruit filling.                                                           Click Here
  3. How about a Blueberry Peach Pie with a gorgeous crust?                                   Click Here
  4. Food Network has some great new designs for apple and pumpkin pies.          Click Here
  5. Ashton over at Something Swanky has a great recipe for a 4th of July Berry Pie that uses two purchased pie crusts. The top crust has cut out stars and the pastry star cutouts are layered on the crust.                                                                                                        Click Here
  6. Not a pie lover, but you love crust? Bridget of Bake at 350 will show you 4 new ways to use pie crust.                                                                                                                   Click Here
Here is my never fail pie crust recipe     Click Here for the recipe

Wednesday, December 21, 2016

Snowman Cookie Exchange Winner

My adorable snowman cookies won 1st in the Best Decorated category in the annual Christmas cookie exchange at work. 

Sugar Cookie recipe   Click Here  Use a 3 inch gingerbread man cookie cutter
Royal Icing recipe      Click Here  Use clear vanilla extract to get snow white icing. 

Icing Colors
  • Apply the white royal icing with a butter knife and allow to dry for about 20 minutes.
  • Tint a small amount of icing black with Americolor Gel Super Black.
  • Tint a small amount of icing orange with 1 drop Americolor Gel Super Red, and 2 drops Americolor Gel Yellow.
  • Put tinted icing into a small decorator bag. Carefully snip the very end of the bag off. Pipe onto the cookies. 

Tuesday, September 20, 2016

Drivin' Down the Road Cupcakes and Smash Cake

Great way to use a number 1 cookie cutter: Gently press the cookie cutter into the frosting and carefully remove it. This will leave the outline of the number 1 and then you can pipe frosting inside the outline. 
Tip - Pipe the number onto the cake first. Then decorate the top of the cake from the center to the edges.
The Road: Pipe four strips of dark gray frosting, side by side, across the cupcake with a #47 basket weave tip with the smooth side up.
The Grass: Use a #67 leaf tip to form the grass on the cupcakes and the smash cake. Hold the pastry bag so that the long slots of the leaf tip are vertical. Pipe and lift to form the grass.
The Road Border and Stripes: Pipe white frosting along the edges of the gray frosting and down the center of the road with a #5 piping tip. 

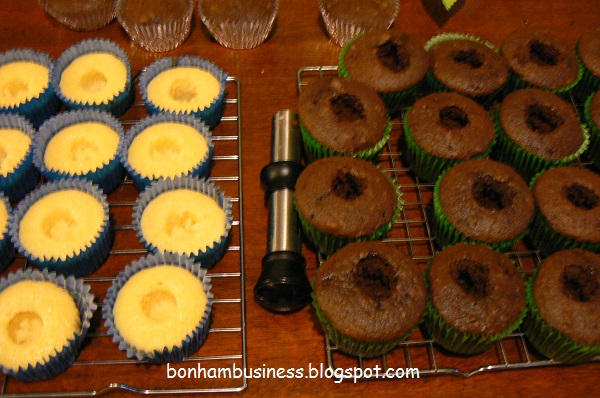
I used a small, stainless steel pan to make this 5.5 to 6 inch smash cake. 
Decorating the Cake Top
  • Gently press the brim of a large glass into the frosted center of the cake top. This will give you a perfect circle for your track center and road. 
  • Fill in the center with a #67 leaf tip and follow the directions above. 
  • Then pipe the road around the circular edge of the grass with a #47 basket weave tip with the smooth side up. 
  • Having your cake on a lazy susan with greatly help with this part of the decorating. Turn the lazy susan as you pipe around the grass edge.
  •  As with the cupcakes, pipe four side by side strips of dark gray frosting to form the road. 

Candy Bar Car Cupcake and Cake Toppers
  • $3 bag of mini-candy bars - about 27 bars
  • 1 large bag of candy coated chocolate candy - I used about half of the candy. 
  • 1 box of teddy bear graham crackers
  • small amount of semi-sweet chocolate chips. 
  • 1 small pastry bag
Chocolate Candy Glue
I placed about  2 Tbsp. of semi-sweet chocolate chips into a pastry bag and microwaved them at 20 second intervals until they were soft and melted. Then I snipped the very end off the pastry bag. This was my "glue" to hold the candy wheels, steering wheel, and bear halves onto the candy bars. 

I have included the video that I watched before making my teddy bear candy cars.
In the video, it shows cutting the steering wheel candy piece in half and piping on headlights. As you can see, I didn't do this and am perfectly happy with the end results!
For video directions        Click Here

Basic Butter Cream Frosting
This is my favorite butter cream frosting and it will frost 2 dozen cupcakes or 1 - 8 inch cake. For 3 dozen cupcakes and the smash cake I made 2 double batches of frosting and had plenty of frosting for the 6 inch smash cake. The smash cake was cut in half and filled with frosting.
Ingredients
  • 4 Tbsp of salted butter, at room temperature
  • 1/2 cup of vegetable shortening Do not use pre-creamed shortening.
  • 1/2 tsp. of vanilla or other extract
  • 1/4 cup of water
  • 1 lb. of confectioners sugar
Directions
  • Place butter and shortening in a mixing bowl.
  • Beat on low speed for 2-3 minutes
  • Add half of the powdered sugar and extract
  • Beat on low speed until the sugar is almost blended with the butter-shortening mixture
  • Add the remaining powdered sugar and the water.
  • Beat at low speed for 2-3 minutes, scraping sides of bowl once or twice. 
You will need to divide and tint your frosting the colors you want.

Sunday, July 10, 2016

Sallee's Cupcake Bouquets

Standard size cupcakes are decorated as flowers in these cupcake bouquets.
The hydrangeas were formed with a 2D decorator tip and the roses were formed with a 1M decorator tip.
Cupcake bouquet pictures have been catching my attention for a couple of years now. 
I have saved pictures of cupcake bouquets and read blog posts about cupcake bouquets. 

After watching several tutorial videos that show how to assemble a cupcake bouquet, I found that there are different ways to make a cupcake bouquet. 

Of course, I picked the easiest one!  

After volunteering to make four dozen cupcakes for a benefit dessert auction, I felt it was time to tackle this project.
The cupcakes are made from boxed cake mixes. Easy peasy, right?

I made devil's food chocolate cupcakes following the package directions.

Then, I used a little bit of cake mix magic with a white cake mix and made white lemon cupcakes. 

Want to know how to make white lemon cupcakes? The directions are underneath the next picture. 
To make a white lemon cake: Add 1/2 tsp. chopped lemon zest, and the juice of two large lemons, about 1/4 cup to a white cake mix. Also, use whole eggs. The light, fresh taste is perfect for summer!
Fresh strawberry butter cream is delish! About 6 large strawberries equals a half cup of strawberry puree. 
How To Make a Cupcake Bouquet Form
1. Staple seven, 5 ounce cups together (as seen in the above picture)
2. Cut a 14" to 16" square of tissue paper using zig zag scissors, paper edgers, or pinking shears.
3. Set the stapled cups in the center of the tissue paper square
4. Fasten the tissue paper in between the cups using packing tape, or hot glue. My cups are waxed paper and I used a hot glue gun. 
5. Repeat to make the number of bouquet forms you need. 

6. Place each form into a container of your choice. I used round, 8"aluminum pans.

However you are free to place the bouquet into any container the form will fit into. Baskets, small pails, or a flower bowl are some of the options you can use. 
Cooled cupcakes ready to be filled with fresh strawberry butter cream. I use an apple corer to remove the center from cupcakes. 
To fill a cupcake
1. Put frosting in a pastry bag, snip the pastry bag tip, and squeeze the frosting into the center of each prepared cupcake. 
2. Start filling at the bottom and lift the bag as the frosting level rises. 
3. Place the filled cupcakes into a cupcake bouquet form.
You are ready to decorate!
Devil's food chocolate cupcakes with fresh strawberry butter cream hydrangea blossoms in place. 
Each hydrangea blossom received a dot of lemon yellow frosting with a #3 piping tip. 

The leaves were placed randomly using a #67 leaf tip. 
To make the roses, use a 1M tip. Start in the center of the cupcake and spiral outward. 
Fresh Strawberry Butter Cream Frosting 
 I filled 4 dozen standard cupcakes and frosted 2 dozen as hydrangeas with 1 batch of  this frosting. It makes a lot! 

Ingredients
  • 2 pound bag of powdered sugar
  • 1 stick of salted butter, at room temperature
  • 1 cup of regular vegetable shortening  Do not use pre-creamed shortening, it is too soft.
  • 1/2 cup of strawberry puree - about 6 large strawberries
  • 2-3 Tablespoons of cold water
Directions
  • Puree 6 large strawberries using a mini-food chopper, blender, or food processor
  • Pour the pureed strawberries into a measuring cup. You should have 1/2 cup of puree. If you have a little more or a little less, don't worry. It doesn't have to be exact. 
  • Place butter and vegetable shortening into a large mixing bowl
  • Beat the butter and shortening until they are blended and creamy, about 2-3 minutes
  • Add half of the powdered sugar, and 1 Tbsp of cold water
  • Beat at low speed until most of the sugar is blended with the butter/shortening mixture.
  • Add remaining sugar and the strawberry puree to the frosting.
  • Beat at low speed for 2-3 minutes, scraping sides of bowl once or twice. 
  • If you feel the frosting is too thick, you can add a Tablespoons of cold water and beat on low for a minute or two.  
Remember the frosting/filling will soften up a little from being at room temperature. You want it to hold its shape when you are piping flowers. 

For the roses I made a small batch of my butter cream frosting using the recipe below.

This is my favorite butter cream frosting!

Ingredients
  • 4 Tbsp of salted butter, at room temperature
  • 1/2 cup of vegetable shortening Do not use pre-creamed shortening.
  • 1/4 tsp. of vanilla extract
  • 1/4 tsp. raspberry extract
  • 1/4 cup of water
  • 1 lb. of confectioners sugar

Directions

  • Place butter and shortening in a mixing bowl.
  • Beat on low speed for 2-3 minutes
  • Add half of the powdered sugar and both extracts.
  • Beat on low speed until the sugar almost blended with the butter-shortening mixture
  • Add the remaining powdered sugar and the water.
  • Beat at low speed for 2-3 minutes, scraping sides of bowl once or twice. 
You will need to divide and tint your frosting the colors you want.


Saturday, March 26, 2016

Easter Bunny Cupcakes

Marshmallow Bunny and Easter Egg Cupcakes
Chocolate Rabbit and Easter Egg Cupcakes
Easter Candy for Decorating the Cupcakes
L to R from top left:
 Easter Sixlets candy, marshmallow bunnies, speckled bird egg jelly beans, and small, foil wrapped, chocolate rabbits.
Step 1 - Bake 24 cupcakes according to the package directions and cool.
Step 2 - Put the cool cupcakes into clear plastic party cups
Cooled cupcakes in party cups ready to frost. 
Step 3 - Using a 1M decorating tip and frosting in leaf green and sky blue, make overlapping stars to resemble grass.
Step 4 - Insert toothpicks as shown in the pictures below and place the rabbits into the center of each frosted cupcake. I had to use a small jeweler's screwdriver to poke a hole through the plastic wrapper so I could insert the toothpick into the candy rabbit. 
Step 5 - Place 3 jelly beans and 3-4 Sixlet candies around each candy bunny.
Step 6 - Place each cupcake into an Easter treat bag and tie the top closed with curling ribbon. I used an iridescent baby blue ribbon that I found at the local dollar store.
Bagged Easter Bunny cupcakes ready to be given as gifts. 


Monday, March 14, 2016

A Spring Bunny Cake

My daughter gave me a mini-rabbit cake pan and today was the day to bake a bunny cake with it.
I used a box of strawberry cake mix and followed the package directions. One box of cake mix made enough cake batter for one bunny cake and five standard cupcakes.
Baking Times
bunny cake: about 25-30 minutes
5 cupcakes: about 12 minutes
  • After cooling the cake completely on a baking rack, apply a thin base coat of frosting. Make sure to fill in any gaps between the cake and cake plate. 
  • Put the cake in the freezer compartment of your refrigerator until the base coat is completely firm.

Decorator Tips
white bunny fur - #177 drop flower tip
pink accents - #16 open star tip
eye center - upside down chocolate chips

Remove the cake from the freezer and frost in the following order:
  1. outline and fill in the pink ear centers.
  2. pipe the nose and mouth
  3. make two pink circles for the eyes
  4. pipe on the fur over the entire cake
  5. apply upside down chocolate chips for pupil of eyes
  6. pipe eyelashes and whiskers. 
Your spring bunny cake is now ready to present to your family.

Amazon.com sells similar cake pans for under $10. Now you can make a bunny cake too!


Monday, September 21, 2015

SalleeShares: The MasterChef Grand Finale


I am going to tell you a secret. Are you ready? Here it is - I do not watch MasterChef until the final six chefs are left. Yep, I prefer to not watch until the top six chefs are consistently bringing their A game and have found their culinary voice. Season 6 has had an unusually high calibre of home cook competing. 

Due to the outstanding cooking abilities of the home cooks, Season 6 has been exciting. Judges Gordon Ramsey, Graham Elliot, and Christina Tosi have consistently remarked that each home cook is cooking at a professional restaurant level. Wow, fine dining from home cooks is exciting. However, the top 3 were fairly easy to pick out.

The final three contestants - Derek Peltz, Claudia Sandoval, and Stephen Lee - were simply amazing to watch as they cooked for a VIP crowd of thirty in the MasterChef Restaurant. The VIP's were the culinary teams behind Gordon Ramsey, Graham Elliot, and Christina Tosi. Can you imagine cooking for professional sou chefs, pastry chefs, and restaurant managers? With a quarter of a million dollars and a cookbook deal at stake, the three finalists cooked their hearts out. 

Stephen was edged out by Claudia by the smallest seasoning margin. However, Gordon Ramsey told Stephen to get together his food truck business plan and he would personally invest. You know that the cooking level is amazing to have a world famous chef offering to invest in your food truck dream. Maybe Stephen needs to consider going onto the Great American Food Truck Race?

Claudia and Derek faced off in a three course meal consisting of an appetizer, an entree, and dessert. Family members were present at the final cook-off. Claudia asked her mom and grandma to pray for her and I do believe God was involved in Claudia's cooking as she stuck to her Latino cooking heritage and brought it to a fine dining level. Graham Elliot said she was cooking with "la vida loca", an ultimate accolade for a home cook.  

Derek and Claudia consistently presented beautiful plates that contained heavenly, well seasoned, offering to the three judges. Ultimately, Claudia won by the narrowest of margins. 

Congratulations Claudia Sandoval! 

Sunday, September 13, 2015

Princess Party Cupcake


My church has a dedicated lady who sponsors an annual Kindergarten to 4th grade princess party. When I asked her how I could help this year, she asked if I could make pink, frilly, jumbo cupcakes. My reply? You know I said,"Sure, I can do that. How many do you need?" 
Her answer was twenty cupcakes. 

My first step to planning any cupcake is to look at pictures of cupcakes that have been created by other bakers.  In about 20 minutes, I knew exactly how I wanted the princess cupcakes to look. 

Pink,ruffled, ombre layers, sparkling with clear sanding sugar, and topped with a white fondant crown sitting in a silver foil liner. 

Yes, that was my vision for the perfect Princess Party Cupcake. 

The Day Before Baking
Make white fondant crowns and let them air dry on parchment paper. 
 Click Here for the pictorial directions for making the crowns over at Cuppycakes & more. 

Creating Princess Cupcakes Step 1 -  Bake 24 jumbo cupcakes using 2 boxes of Party Rainbow Chip cake mix. Follow the package directions for mixing and baking temperature. Bake for about 18 minutes.
Step 2 -  While the cupcakes are cooling, make butter cream frosting and tint one third dark pink. Put the dark pink frosting into a piping bag that has been fitted with a Wilton #125 petal tip. 
Click Here for my Silky Smooth Butter Cream Frosting Recipe
Step 3 - Place a cooled cupcake onto a lazy susan and pipe a ruffle around the outside edge of each cupcake. 
Note: I tried holding and turning a cupcake while piping on the first ruffle. It was difficult to achieve a uniform ruffle. The difference between the first, hand-held ruffle and the second, lazy susan ruffle in the picture below is noticeable. 
Step 4 - Squeeze the unused dark pink frosting from the pastry bag into a small bowl. 
Add additional white frosting and stir. I do not measure the white frosting when I do this. I just add white frosting and stir until I have a paler pink that I am happy with. 
Load the same pastry bag with the paler pink frosting. 
Before piping the second ruffle, squeeze the pastry bag and clear the remaining dark pink frosting from the piping tip. Repeat step 3 with all of the cupcakes. 
NOTE: You will achieve a stripe effect on your second ruffle from using the same pastry bag.

Repeat Step 4 for your third ruffle. I used the same pale pink for the third and fourth ruffles. Apply sanding sugar to each cupcake after piping the third and fourth ruffles. 

Step 5 - Top each cupcake with a white fondant crown.

For how I made the crowns, Click Here for the pictorial over at Cuppycakes & more. 


Monday, August 31, 2015

SalleeShares: Using Petal Tips for First Time

 Butter cream drop flowers and star tip roses have been my go-to decorating technique. 
However, petal tips intrigue me and I decided to expand my decorating skills. After watching a Global Sugar Art video on YouTube, I decided to attempt decorating cupcakes using Wilton's #104 and #125 petal tips. 

Sallee's Six Steps
1. Cake mix cupcakes - 2 dozen from a box. I prepared the cupcakes following the package directions.
2. Make a large batch of Sallee's Silky Smooth Butter Cream Frosting while the cupcakes are baking . Click Here for the recipe.
3. Apply a base coat of butter cream frosting to the top of each cupcake, being careful to create a smooth, level top.
4. I used the #104 tip to create a green ruffle effect around the outer edge of each cupcake.
5. Refrigerate the cupcakes for about 15 minutes to let the green frosting firm up.
6. Pipe petals onto 12 cupcakes. Using a Wilton #2D tip, I made teal hydrangeas in the center of the other 12 cupcakes
 Note: I have hot hands, which means I am putting my frosting bags and cupcakes into the refrigerator to chill for 15 minutes after each step.

Watch the Global Sugar Art video, too!  Click Here

List of the Frosting Tips

  • Wilton #104 - green ruffled border
  • Wilton #125 - pink flower
  • Wilton # 2D - blue hydrangeas
  • #3 piping tip - yellow dots for flower centers

Monday, August 24, 2015

Butter Cream Flower Birthday Cake with Cupcakes

My newest cake creation!  You can make a cake like this too! All you need are two boxes of cake mix, white and colored butter cream frosting, five decorating tips, and some pastry bags. I am a self-taught decorator. I watch video tutorials and then try out the techniques. 

These two-tone hydrangeas make me particularly happy. I am a fan of Rosie Cake-Diva on YouTube and followed her tutorial to create the hydrangea flowers on the cake and cupcakes. Click Here for her tutorial.

The piped lettering is with a Wilton #5 tip.
Tip: Pipe on your lettering before you start adding decorations.Mistakes are much easier to repair.  
Matching cupcakes created with a #67 leaf tip, #177 drop flower tip, and a Wilton 2D tip.
An upside down look at flowers decorating the cake top!
Wilton gel coloring in leaf green, sky blue, and violet
Leaves - #67 leaf tip
Flower and flower center -  #177 drop flower tip
Wilton gel coloring in leaf green and violet; McCormick liquid yellow food coloring
Leaves - #67 leaf tip
Flowers -  Wilton #224 drop flower tip
Flower center - Wilton #5 tip
Wilton gel coloring in pink and burgundy
Leaves - #67 leaf tip
Hydrangea - Wilton 2D tip
Corner detail
Blue border was made with the #177 drop flower tip. 

The Cake and Cupcakes

I used two white cake mixes for the 13 x 9 x 2 inch cake and 2 dozen cupcakes. I followed the package directions for mixing,baking,and cooling. However, I use whole eggs, not egg whites.

Then, I put the cupcakes and cake into the refrigerator for about 30 minutes to get nice and cold before frosting.
Frosting the Cake
  • Frost the cake with a thin layer of frosting. This is called a crumb coat. 
  • Return the cake to the refrigerator to firm up the frosting. 
  • After the crumb coat is firmed up and hardened, Frost the cake top and sides.
  •  Again, return the cake to the refrigerator until the frosting has formed a "crust", or feels firm to a light touch. 
  • Your cake is now ready to have the lettering piped on.
  • Pipe on your flowers.
Frosting the Cupcakes
  • I did not use a base coat of frosting on the cool cupcakes.
  • I piped on the green garland first, then piped the flowers

Silky Smooth Ivory Butter Cream Frosting

Yield: frosting for one 13 x 9 x 2 inch cake and 2 dozen cupcakes.


Update 2/25/2016  Butter prices have almost doubled in the last year, $2.25 to $4.15. This recipe will work well if you use 1 cup of shortening and 1 stick of salted butter. 

Ingredients
2 sticks of salted butter, at room temperature
1/2 cup of vegetable shortening
1 tsp. vanilla extract
1/2 cup of water
2 lb. bag of confectioners sugar

Directions
  • Place room temp. butter and vegetable shortening into a mixing bowl.
  • Using an electric mixer on low speed, cream the butter and vegetable shortening together for 2-3 minutes.
  • Add about 1/4 of the confectioners sugar and the vanilla extract.
  • Beat with the mixer on low speed until well blended.
  • Add another 1/3 of the remaining confectioners sugar and continue to mix at low speed until the frosting is well blended.
  • Add 1/2 cup of water and half of the remaining confectioners sugar.
  • Beat until well blended.
  • Add remaining confectioners sugar.
  • Continue to mix with the electric mixer on low speed.
  • If coloring the frosting, add food coloring now.
  • Blend food coloring into the frosting until the desired color is achieved.
Cake Frosting
  • Put 2 cups of butter cream frosting into a bowl.
  • Add 1 tsp of water. 
  • Stir until well blended
You now you have cake frosting! How easy is that? 

Small Batch Variation
 Reduce ingredients by half:
1 stick of butter
1/4 cup of vegetable shortening
1/2 tsp. of vanilla extract
1/4 cup of water
1 lb. of confectioners sugar

Follow the same directions as the large batch recipe. 


Thursday, July 2, 2015

A Chocolate Chip Cookie Dough-Strawberry-Banana Split


This week, the local grocery store has ice cream and frozen, whole strawberries on sale. Happily, I decided it was time to make my favorite July dessert - a banana split! 

I must have stood in front of the dairy case for five minutes trying to decide on one flavor of ice cream. What a tough decision, picking one flavor out of fifteen flavors! Finally, a carton of chocolate chip cookie dough was sitting in the shopping cart beside the bunch of bananas and the one pound package of whole frozen strawberries. 

Before making supper, I poured the pound of frozen strawberries into a quart bowl to thaw and sprinkled a 1/4 cup of sugar over the berries. I knew that supper was going to take about an hour to cook, plenty of time for the berries to thaw. However, I can always thaw frozen berries in the microwave by using the timed defrost setting.  

After supper, it was time to assemble and make two banana splits in the vintage glass banana split dishes I love. Carefully, I split two bananas in half and laid them in the bottom of each dish. Three scoops of ice cream soon sat on top of the split bananas. Then, I spooned the now thawed, sweetened strawberries over the middle scoop of ice cream and I squeezed chocolate syrup over the end scoops of ice cream. That's it, an easy dessert that looks elegant when served in glass serving dishes. 

Now, it is time to eat a banana split!


Monday, June 1, 2015

Repurposing a Jello Mold as a Cake Pan

I love vintage jello molds. I do not know why, but the intricate details and shiny, molded metal just grabs my attention and begs me to buy the mold. What do you do with jello molds when you do not make jello salads? Bake small cakes to use as gifts or as a cake topper for a larger cake! The Mirro jello mold below is about 10 inches by 5.5 inches and about 3 inches deep.
A vintage, fruit basket gelatin mold by Mirro. The mold's capacity is three and a half cups.
The mold sits completely flat and level on a hard surface.
Grease with shortening and flour generously with about 1 rounded Tbsp. of flour
Place in a glass baking dish and fill about 2/3 full with batter

Because a jello mold pan is very thin, make sure you place the batter-filled mold into a cake pan, or casserole dish to bake. Also, bake in at about 325 degrees to 350 degrees Fahrenheit. The cake will bake slower, but your final product will be more tender and moist. This cake took 55 minutes to bake at 325 degrees Fahrenheit.
Cool for 10 minutes before unmolding, or follow the cooling directions for your cake recipe.
Unmolded cake cooling and waiting to be decorated.
Next time you see a vintage jello mold, buy it and make a cute, one layer cake to give as a gift, or to surprise your family.  Or, use your mold to make a cake topper for a larger cake. 
This spring flower basket cake topper was quite a hit with my coworkers.