Showing posts with label recipe. Show all posts

Friday, July 14, 2017

Oat Flour Sweet Potato Pancakes - A Gluten-Free Recipe

Golden brown and delicious oat flour sweet potato pancakes.
These pancakes are approximately 3.25 inches in diameter.

This morning Bill and I tried out this recipe that I adapted from superhealthykids.com. My changes are the gluten-free oat flour, ground flax seed, and honey. 


The pancake texture is denser than a traditional pancake and reminds me of bread pudding. The cinnamon, sweet potato flavor is only enhanced by the slightly nutty flavor of the ground flax seed. 

Yield and Nutrients
6 pancakes, 3.25 inch diameter
112 calories and 19 carbohydrate grams for each pancake
Ingredients
  1. 1/2 cup, cooked sweet potato, mashed with a fork
  2. 1 cup 1% milk
  3. 1/4 to 1/2 teaspoon ground cinnamon
  4. 1/2 tsp.  vanilla extract
  5. 1 large egg
  6. 3/4 cup rolled oats, blended into oat flour
  7. 1 Tbsp. raw flax seed, ground in a blender
  8. 2 tsp.  baking powder
  9. 1/4 tsp. salt
  10. 1 Tbsp. honey
Directions Step 1
  • Put 3/4 cup rolled oats into a blender. Use the grind setting and pulse into flour.
  • Put oat flour in a medium mixing bowl.
  • Put 1 Tbsp of flax seed into a blender and pulse with grind setting
  • Add the ground flax seed to the oat flour and set the bowl aside.
Directions Step 2
  • Put the first five ingredients into a blender.
  • Blend on stir setting for about 20-30 seconds
  • Add the liquid ingredients into the oat flour mixture and stir until well blended
  • Let the batter sit for 2-3 minutes to thicken up.
  • Add more milk if needed to thin down the pancake batter.
  • Then pour 1/4 cup batter onto a hot griddle for each pancake. Use a lower temperature than a wheat bas
  • Flip pancake when it begins to bubble and is browned.
 Note: Sweet potato browns quickly so make sure your griddle isn't too hot. 

Homemade breakfast pancakes  = homemade happiness on a plate!

Friday, July 7, 2017

First Time Putting Spinach in a Smoothie

I made my first ever smoothie with spinach in it!
The taste was mango/strawberry with a hint of another flavor and surprisingly good. The luscious, thick smoothie was GREEN.

Go ahead and laugh, I don't mind.
If you have been hesitating about putting spinach in a smoothie, quit hesitating and go for it! The results will surprise you, I promise.

Recipe   Yield: One 10-12 ounce smoothie
  • 1/2 cup 1% milk
  • 1 handful of spinach I didn't grab a fistful, just reached into the bag and picked up spinach leaves between my fingers and thumb.
  • half of a diced mango
  • 3 fresh strawberries, stemmed and sliced. 

Directions
Put all the ingredients into a blender, or processor and blend until smooth and thick.
Pour into a 10-12 ounce glass and enjoy your smoothie!

Never tried using a mango and don't know how to cut it up? 
Watch the video below and you will be ready to slice and dice a mango.


#spinachsmoothie #eathealthy 

Thursday, June 29, 2017

Pineapple Mug Cake

Enjoy pineapple mug cake in or out of the mug! 
The texture of this mug cake isn't nearly as dense as most of the made-from-scratch mug cake recipes that I have tried. I feel like this is a great way to make small servings of cake.
Yield: about 2 - 12 ounce servings, or about 4 - 6 ounce servings
  1. Two 12 oz. mugs
  2. Crack a large egg into a small bowl and beat with a fork until the yolk and egg white are blended fairly well. 
                                               One large egg makes about 3 Tbsp. of beaten egg.

Measure the following ingredients into each mug:

  • 6 Tbsp pineapple cake mix
  • 3 Tbsp water
  • 3 Tbsp melted butter, or melted shortening. Canola oil may be used too. 
  • about 1 1/2 Tbsp. beaten egg
  • 1/4 tsp. vanilla extract
    Ready to stir.
Directions


  • Stir ingredients in each mug together for about a minute, or until smooth and well blended.
    Smooth and well blended. Ready to microwave.
  • Place mugs into microwave  and cook for 3 minutes. Cooking time is for a 900 - 1000 watt microwave. 
  • The cake will rise to the top of the mug.
    Immediately after microwaving 3 minutes.
  • Remove the mugs from the microwave and allow to cool 2-3 minutes.
    After cooling 2-3 minutes, the mug cake can be turned out of the mug. 
  • At this point, you can turn the cake out onto a plate, or you can leave the cake in the mug.
    The mug cake slips out of the stoneware mug easily. The mug wasn't oiled or greased.
    Top with a topping of your choice and enjoy!

Monday, June 26, 2017

Cake Mix Mug Cake - A Five Minute Mug Cake

I decided to Google the phrase, cake mix mug cake.
Yep, a few of you have tried this idea out too, BUT I don't think anyone else has had such excellent results as I have.

Why? Because I actually use ideas from more than one mug cake recipe. Yep, I did what I do best...take inspiration from more than one recipe and combine them into a new recipe.
Storing Cake Mix for Mug Cake Use
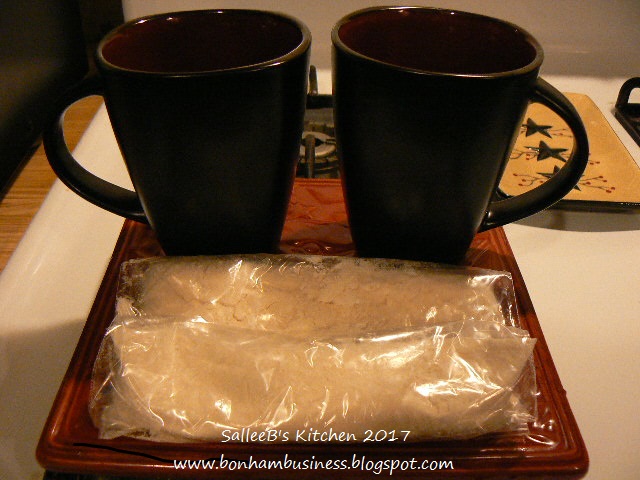
  • Measure out 6 Tbsp. of cake mix into an individual, zip top sandwich bag. Repeat.
  • Roll the bags tightly and zip the tops closed. 
  • Place the rolled bags of cake mix back into the cake mix box to store for use at a later time. 
A 15.25 ounce package of cake mix will make about 7 mug cakes.
A 16.50 ounce package of cake mix will make about 8 mug cakes.

I hope you will try my cake mix hack - Cake Mix Mug Cake.

Recipe for a Five Minute Mug Cake

Yield: about 1 - 12 ounce serving, or about 2 - 6 ounce servings


Directions:
  • Crack a large egg into a small bowl and beat with a fork until the yolk and egg white are blended fairly well. 
    One large egg will yield about 3 Tbsp. of beaten egg, just enough for 2 mug cakes!
  • Set aside.
Measure the following ingredients into a 12 ounce mug:

  • 6 Tbsp cake mix, any flavor
  • 3 Tbsp water
  • 3 Tbsp melted butter, oil, or melted shortening 
  • about 1 1/2 Tbsp. of the beaten egg 
  • 1/4 tsp. vanilla extract
  • Stir ingredients in the mug together for about a minute, or until smooth and well blended.
  • Place mug into microwave  and cook for 3 minutes. Cooking time is for a 900 - 1000 watt microwave. 
  • The cake will rise to the top of the mug.
  • Remove the mug from the microwave and allow to cool 2-3 minutes.
  • At this point, you can turn the cake out onto a plate and slice it into two portions, or you can leave it in the mug for a 12 ounce serving. 
  • Top with the topping of your choice and enjoy!

Wednesday, June 21, 2017

SalleeB's Pizza Casserole

Looks like pizza, but it has a pasta crust!
Bill is not a fan of casseroles. 
However, this casserole won him over because the bottom layer is a tender, angel hair pasta "crust" topped with pizza toppings. A perfect bite contains an even amount of the pizza toppings and the angel hair pasta.
Wow, what a way to make your mouth happy!
Customize this recipe to make your favorite pizza in a casserole! 


Simply substitute a pound of your favorite meat, or a combination of meats. The possibilities are endless.

Ingredients   
This recipe can be downsized from a 13" x 9" pan to a 9" round or square pan.  Simply use half of each listed ingredient.
  • 8 oz. angel hair pasta, broken into thirds and cooked
  • 1 pound ground chuck or sirloin
  • 3-4 oz. pepperoni slices
  • 1/3 cup diced onion
  • 1 -  24 oz. can spaghetti/pasta sauce
  • 6.5 oz. can mushrooms, drained or  6 oz. of fresh, sliced mushrooms
  • 1/2 tsp. dried Italian seasoning
  • 1/4 tsp. garlic powder
  • 1/4 tsp. ground black pepper
  • 8 oz. of shredded mozzarella cheese
  • 2 oz. Parmesan cheese, about 1/2 cup
Directions
  • Grease your casserole pan. Set aside.
  • Break 8 oz. of angel hair pasta into thirds. Place in salted, boiling water. Turn heat down to simmer and cook pasta for five minutes. 
  • Pour half of the pasta sauce into the greased casserole pan.
  • Drain the pasta and place it in the casserole pan.
  • Spread the pasta into a layer.
  • Layer the remaining sauce over the pasta.
  • Place the ground chuck and onion in a skillet. If using fresh sliced mushrooms, add them now.
  • Begin to brown over medium heat, stirring occasionally.
  • When the beef is about half way done, sprinkle the Italian seasoning, garlic powder, and black pepper over the meat and onions. Using a spatula, work the seasoning into the meat and onions.
  • When the beef is almost done, add the drained mushroom slices to the skillet. 
  • Stir briefly with the spatula until the mixture is well blended. 
  • Drain excess grease from the skillet.
  • Layer the meat mixture over the sauce in the casserole dish.
    Pepperoni can be mixed into the meat mixture, or placed on top of the cheese layer.
    I prefer having in on top of  the cheese layer as shown in the first picture.
  • Put cheeses on top of meat mixture
  • Top the cheese with pepperoni slices as shown in the first picture. 
  • Cover with foil.
  • Large Batch: Bake at 350 degrees F for 35 minutes; Small Batch: Bake at 350 degrees F for 20 minutes
  • Remove foil and bake another 10 minutes. 
  • Remove from oven and let sit for 10 minutes.
Your pizza casserole is ready to serve!

Pantry-Style Tomato Beef Vegetable Soup

I have been suffering with a sore throat for a couple of days. Vegetable soup was the only thing I felt like making and eating. Additionally, I knew the tomato beef soup would be quick and easy to assemble because my pantry contained all of the ingredients that I needed.

Makes about 4-1 cup servings.

Ingredients
  • 2 cups of water
  • 2 beef bouillon cube
  • 1 can diced tomatoes
  • 1 can of whole kernel corn, drained
  • 1 can of green beans, drained
  • 1 piece of bacon, finely diced 
  • 1 tsp basil, dried
  • 1/2 tsp. parsley,dried 
  • 1/2 tsp. sriracha sauce 
  • 1 pkg of crushed ramen noodles, do not use the seasoning packet
Directions
  1.  Put the water and bouillon cubes in a medium sauce pan
  2. Add the whole can of diced tomatoes, juice and all
  3. Drain the corn and green beans, put into the pan
  4. Put everything except the crushed noodles into the pan and simmer until the bacon is cooked. 
  5. Put the crushed ramen noodles in and let them sit for 3 minutes. 
This is a thick, veggie soup. If you like a thinner soup, add an additional cup of water and 1 more bouillon cube.


Saturday, June 17, 2017

No Bake Chocolate Cheesecake Dessert with Chocolate Chip Cookie Crust

Hot summer days are here again!
I don't know about you, but I don't even want to think about turning on my oven and heating up the kitchen. Instead, I like making no bake desserts that are quick to make and require minimum time in the kitchen. 

I believe this is the perfect recipe for beginning cooks. 5 ingredients is all it takes to make an easy and elegant chocolate cheesecake dessert. Your friends will think you worked for hours!


No Bake Chocolate Cheesecake Dessert with Chocolate Chip Cookie Crust
Ingredients
2 - 3.4 oz pkg of instant cheesecake pudding mix
2 - 3.4 oz pkg of instant chocolate pudding mix
6 cups of milk
12 chocolate chip cookies, crushed to fine crumbs
4 Tbsp. of melted butter

Directions
  • Blend, process, or crush 12 chocolate chip cookies into fine crumbs.
  • Add 4 Tbsp. of melted butter to the cookie crumbs.
  • Stir until mixed well. Measure out 2 Tbsp. of the cookie crumbs and set aside.
  • Press the remaining cookie crumb mixture into the bottom of a 9" spring-form pan
  • Pour 3 cups of cold milk into a bowl. Add the packages of chocolate pudding and beat for 1 minute. 
  • Pour the pudding into the cookie crust and spread evenly.
  • Set pudding into the refrigerator for 10 minutes.
  • Pour 3 cups of cold milk into a bowl. Add the packages of cheesecake pudding and beat for 1 minute. 
  • Pour the cheesecake pudding on top of the chocolate pudding layer. 
  • Garnish with the reserved 2 Tbsp. of  crumbled chocolate chip cookie
  • Chill until firm, about 2-3 hours
  • Gently loosen the spring-form pan sides and lift away from the dessert.
  • Slice and serve. If desired, top each slice with 1-2 Tbsp. of whipped cream, or whipped topping. 
Enjoy a slice of homemade happiness on a plate!

Monday, February 6, 2017

Baked Italian Pasta Skillet


Yield: 4-6 servings         Time: about 40-50 minutes
Ingredients
  • 8 ounces of small shell pasta
  • 1/2 pound ground chuck
  • 1/2 pound whole hog, mild pork sausage
  • 1/2 teaspoon dried Italian seasoning
  • 1 teaspoon brown sugar
  • 1  - 4 ounce can mushrooms, drained
  • 1 - 24 ounce can meat spaghetti sauce
  • 1 - 10.5 ounce can cream of mushroom soup
  • 1/8 cup water
  • 1 cup shredded Colby jack cheese, slightly packed
  • 1 Tablespoon Parmesan Romano cheese
  • 1 ounce, or about 18 thin slices of pepperoni
Directions
  • Preheat oven to 350 degrees F or 175 degrees C
  • Fill a 2 to 2.5 quart sauce pan about three-quarters full of water and bring to a boil. Do not add salt.
  • While you're waiting for the water to boil, chunk up and brown the ground chuck, pork sausage, and dried Italian seasoning in a 12 inch, oven safe skillet.
  • Sprinkle 1/4 teaspoon of Italian seasoning over the meat and mix it with a spatula as the meat browns.
  • Place the browned meat into a colander that is sitting on top of another dish, or paper towels to drain off any excess fat.
  • When your pot of water begins to boil, pour in shell pasta, and cook until al dente, about 7 - 8 minutes. Let the pot of water come back to a simmer after adding the pasta, but don't boil it. 
  • While the pasta cooks, rinse your oven proof skillet briefly with hot water to remove excess fat.
  • Next, combine the spaghetti sauce, mushroom soup, drained mushrooms, water, teaspoon of brown sugar, and 1/4 tsp. of dried Italian seasoning in the skillet.
  • Add the browned meat.
  • Drain the al dente pasta and stir it into the skillet of meat sauce.
  • Slice pepperoni slices into quarters and sprinkle over the top of the pasta mixture.
  • Next, sprinkle the cup of shredded cheese over the top of the pasta
  • Finally, sprinkle the Parmesan Romano cheese over the top of the shredded cheese.
  • Bake in preheated oven until the cheese is melted and bubbly, about 20 - 25 minutes.
Enjoy eating some almost homemade happiness on a plate!

Saturday, December 24, 2016

Cocoa Drop Cookies

Holiday cocoa drop cookies dipped into vanilla almond bark and sprinkled with .....Christmas sprinkles!
Bill ate one of these cookies and he LOVED the vanilla bark side!
He's my official taste tester and fellow lover of sweets. In fact, he would be happy if I dipped the WHOLE cookie in almond bark. 

However, I love the contrast between the dark chocolate of the cookie and the white of the almond bark side.

Personally, I like using almond bark in place of chocolate because it is so easy to use. 
Just pop two or three squares of almond bark and 1 tsp solid vegetable shortening into a small deep bowl and microwave in 30 second bursts and stir until the bark is melted and smooth. 
You are ready to dip cookies!

Yield: about 4 dozen cookies
Time: 1 hour chill time          8-10 minute bake time for each cookie sheet of cookies.

Ingredients
  • 1 cup sugar 
  • 2/3 cup salted butter, softened
  • 1 egg
  • 1/2 cup cocoa powder
  • 1/3 cup water
  • 1 tsp. vanilla extract
  • 1 3/4 cup all purpose flour
  • 1/2 tsp. baking soda
  • 1/2 tsp. salt
Directions
  • Place sugar, butter, egg, water, and vanilla into a medium size bowl and mix until blended.
  • Stir in flour, cocoa powder, baking soda, and salt. Stir until mixed well.
  • Cover bowl tightly and chill in the refrigerator for about an hour.
  • Preheat oven to 400 degrees Fahrenheit. 
  • Drop dough by rounded teaspoonfuls about 2 inches apart on to an ungreased, or parchment paper lined cookie sheet. 
  • Bake until almost no indentation remains when touched, with is about 8-10 minutes. 
  • Immediately remove from the cookie sheet and cool.
Dipping the Baked Cookies
  • Once the cookies are cool, melt 3-4 squares of vanilla almond and 1- 2 tsp. of solid vegetable shortening in a small, deep bowl, following the package directions. I wing it and put the ingredients in the bowl and microwave in 30 second bursts and stir in between the bursts until the almond bark and shortening are melted. 
  • Dip each cookie into the bark, shake off excess bark, and add sprinkles. My method consists of pouring the sprinkles into a soup bowl and holding the dipped cookie over the bowl as I sprinkle the decorations on each cookie. This is a great job for the kids! 
  • Set dipped cookies onto a parchment paper lined cookie sheet. 
  • When the cookie sheet is full of dipped cookies, put the cookie sheet into the freezer for 5 minutes to set the vanilla bark.
  •  Remove cookie sheet from the freezer and cookies are ready to start packaging.
Enjoy eating some homemade happiness on a plate! 

Friday, December 23, 2016

Applesauce Drop Cookies with Easy Caramel-Coffee Frosting

Christmas Applesauce Drop Cookies dressed up with a vanilla almond bark swirl and gold food spray.

My annual Christmas baking began on December 21 this year.
I just had a little trouble getting into the baking mood after making and decorating a half sheet cake for our CMA Christmas party. How about you? There always seems to be so much to do between Thanksgiving and Christmas Eve. 

Additionally, I made 4 dozen cutout snowmen cookies for the Christmas cookie exchange at work. I love baking, but sometimes I just need to make the baking easy on myself by making drop cookies to accompany the decorated, holiday sugar cookies. 

Yield: about 3-4 dozen cookies 
  • Heaping teaspoonful of dough makes 3 dozen
  • Slightly rounded teaspoonful of dough makes 4 dozen
Time: 1 hour chill time       8-10 minutes bake time

Cookie Ingredients
  • 1 cup packed brown sugar
  • 1/2 cup shortening
  • 1/2 cup unsweetened applesauce
  • 1 egg
  • 1 3/4 cups all purpose flour
  • 1/2 tsp. baking soda
  • 1/2 tsp. salt
Caramel-Coffee Frosting  See the recipe and ingredients below
Directions
  • Put brown sugar, shortening, applesauce, and egg into a medium sized bowl and mix well with a whisk, or a hand mixer.
  • Add flour, baking soda, and salt. Stir by hand until blended well.
Cover and refrigerate the dough for at least 1 hour. I make the cookie dough the evening before I want to bake.
  • Heat oven to 400 degrees F. 
  • Measure dough out with a teaspoon and scoop out a rounded teaspoonful. Use a second spoon to aid in dropping the dough onto your cookie sheet.
  • Drop rounded teaspoonfuls of dough about 2 inches onto an ungreased, or parchment lined cookie sheet.
  • Bake for about 8-10 minutes, or until almost no indentation remains when you touch the cookie top. Also, cookies will harden somewhat as they cool.
  • Immediately remove from the cookie sheet and cool. 
Cookie Baking Tip
Lining a cookie sheet with parchment paper makes transferring hot cookies VERY easy. 

You just slide the entire sheet of cookies out of the pan and onto the cooling rack. 
No trying to slide a spatula under hot cookies! Yeah!
Caramel-Coffee Frosting

Ingredients
  • 1/4 cup salted butter 
  • 2 cups powdered sugar
  • 1 tsp. caramel flavoring
  • 2 Tablespoons cold coffee
Directions
  • Heat butter in a 1.5 quart sauce pan over low heat. 
  • Remove pan from the heat when the butter is melted.
  • Stir in powdered sugar and caramel flavoring
  • Stir in coffee until frosting is smooth and spreadable
  • Cover tightly until ready to use the frosting
This frosting dries quite quickly, so keep a damp paper towel over the frosting and cover tightly if you need to stop frosting your cooled cookies. 

Perfect Drop Cookies Every Time Tips
  1. Keep the cookie dough refrigerated in between batches
  2. Put cold cookie dough onto a cool cookie sheet each time. Baking times are figured from the time you put a batch of cold dough onto a cool cookie sheet. 

Friday, November 25, 2016

SalleeB's Thanksgiving Pies

Happy Thanksgiving Weekend! 
I hope your 2016 Thanksgiving dinner was, or will be, wonderful. What a marvelous Thanksgiving day Bill and I enjoyed with the girls and their families! 

On Wednesday evening,
I joined Ashley in her kitchen and visited with her while making bread stuffing. 

Ashley has recently started baking from scratch and Momma Sallee gave her a couple of pointers for her apple pie and crust. As a mom and a cook, I am going to tell you that Ashley's apple pie, pumpkin pie, and turkey were perfect. Her boyfriend Scott also cooks and he made the mashed potatoes.

My contribution to the family meal included a cherry pie, cranberry-orange sauce, and traditional, out-of-the-can jellied cranberry sauce. However, as you can see in the picture above, I made a pumpkin pie that stayed at home for Bill and I to eat over the weekend. 

Thanksgiving Day 2016 was wonderful. The afternoon of joking, laughter, eating, and family time is stored in my memory for the rest of my life. I am thankful for such a precious memory.

Recipes

Chill and Thrill Pie Crust - A Never Fail Pie Crust 
                        
I published my go-to pie crust recipe in a post called, "Chill and Thrill Pie Crust." The link to the recipe is below.

Click Here for the recipe. 

Quick and Tasty Cherry Pie

Ingredients

  • 2 cans of cherry pie filling
  • 1/2 tsp. almond extract
  • 1 tsp. cinnamon
  • 1/4 tsp. allspice
  • pie crust for a 9 inch double crust pie

Directions

  • Open the two cans of cherry pie filling. Using a spatula, remove the filling from the cans and put into a 1 quart bowl. 
  • Add the almond extract, cinnamon, and allspice to the bowl.
  • Using a spatula, gently fold the spices and extract into the filling. You want to keep the cherries from breaking apart as much as possible. 
  • Put the filling into a pie crust lined, 9 inch pie pan. 
  • Gently level the cherry pie filling
  • Place the top crust onto the pie and crimp the edges together. 
  • Cut a few small slits into the top crust
  • Put the pie into a 350 degree Fahrenheit oven. Bake for 30-40 minutes.
  • Remove from the oven and allow to cool at room temperature.

Cut and serve up a slice of  homemade happiness on a plate!


SalleeB's Pumpkin Pie

  • 1-14 oz. can of sweetened condensed milk
  • 1-15 oz. can of pumpkin puree
  • 1 large egg and 3 egg yolks
  • 1/2 tsp. salt
  • 1 tsp. ground cinnamon 
Note: 1 and 1/2 tsp. of pumpkin pie spice can be used in place of the cinnamon, ginger, and nutmeg.
  • 1/2 tsp. ground ginger
  • 1/4 tsp. nutmeg
  • one 9 inch pie crust. 
Directions

  • Mix pumpkin and eggs in a one quart bowl until smooth
  • Add all of the ingredients to the pumpkin/egg mixture
  • Mix until blended well
  • Pour into a pie crust lined, 9 inch pie pan
  • Put into a preheated, 425 degrees Fahrenheit oven for 15 minutes before lowering the temperature to 350 degrees Fahrenheit and baking for an additional 30 - 40 minutes. 
To test for doneness
 Insert the blade of a knife into the pie about midway between the center and edge of the pie. Lift the knife and look at the knife blade. If it doesn't have pumpkin on it, the pie is done. 

You may notice that in the picture above there isn't a slit, or hole in the pumpkin pie. I carefully and gently touched the center of the pie with a fingertip. The pie felt firm, the center had expanded upward and was rounded. I judged the pie to be done based on this. My hands are not super sensitive to heat, but I don't recommend that you try my method. 


Sunday, October 30, 2016

Chocolate Chip Cake and Starlight Cake with Fall Candy Decorations

The Fall Festival  at church is tomorrow and I promised to bake 6 cakes for the cake walk. Besides cakes for church, I need to bake mini-cupcakes for the Halloween party at work, too.

In most of my cake/cupcake posts, I choose to use boxes of cake mix. Today is different. Instead of cake mix cakes, I chose to use two recipes from my 1985 Betty Crocker cookbook, chocolate chip cake and starlight cake.

Starlight cake is a yellow cake that is made with vanilla extract. The chocolate chip cake uses brown sugar and granulated sugar. The batter does smell like chocolate chip cookie dough!

Maybe because of my cake mix ways, I did not use the shortening called for in the recipes. Instead, I substituted 1/2 cup of canola oil for the shortening, and reduced the amount of milk from 1 1/4 cup to 3/4 of a cup. Personally, I was happy with the batter and my cakes were nice and moist.

Starlight mini-cupcakes with vanilla buttercream frosting. Each cupcake is topped with black and orange sprinkles and two pieces of candy corn. 

Starlight cake with peanut butter buttercream frosting.  The cake is decorated with a candy pumpkin, candy corn, orange/black sprinkles mix, and mini-flower decors. 

Chocolate chip cake with peanut butter buttercream frosting. See the frosting recipe below.

Peanut Butter Buttercream Frosting - This recipe will frost about five single-layer 8" cakes. 

Ingredients

  • 1 cup creamy peanut butter
  • 1/2 cup butter, at room temperature
  • 2 lbs. of powdered sugar
  • about 3/4 cup of milk
  • 3 tsp. vanilla extract

Directions

  • Put butter and peanut butter into a large mixing bowl. Beat at medium speed until the butter and peanut butter is light and creamy. 
  • Add one third of the powdered sugar and vanilla extract. Beat on low speed until the powdered sugar is blended with the butter mixture.
  • Add half of the remaining sugar, and 1/2 cup of milk. Beat on low speed until the powdered sugar is about mixed into the frosting. 
  • Add last of sugar and remaining 1/4 cup of milk. Beat on low speed until sugar is incorporated. If frosting is too stiff, add another Tbsp. of milk and blend at low speed. Then, beat on high speed until frosting is smooth and creamy. 
Chocolate Chip Cake
Yield: 1 - 13x9 cake, or 2 - 8" cakes

Ingredients
  • 2 cups all purpose flour
  • 1 cup brown sugar, packed firmly
  • 1/2 cup granulated, white sugar
  • 3 tsp. baking powder
  • 1 tsp. salt
  • 1/2 tsp. baking soda
  • 1/2 cup canola oil
  • 3/4 cup milk
  • 3 large eggs
  • 1/2 cup semisweet chocolate chips
  • 1 1/2 tsp. vanilla extract
Directions
  • Heat oven to 325 degrees. 
  • Grease and flour your pans. I used disposable pans and skipped this step.
  • Put the flour, sugars, baking powder, baking soda and salt into a large mixer bowl. Stir until well blended.
  • Add all of the wet ingredients to the bowl of dry ingredients. 
  • Mix on low speed, scraping bowl constantly for 30 seconds. Then beat on high speed for 3 minutes.
  • Add chocolate chips and stir into batter.
  • Pour batter into cake pan(s).
  • Bake for about 30-35 minutes, or until a wooden tooth pick inserted into the center comes out clean. 
  • Gently remove  the cake from the oven and place on a cooling rack until cool. 
  • Frost with desired frosting. 

Starlight Cake
Yield: 1-13x9 cake, or 2-8" cakes

Ingredients
  • 2 1/4 cup all purpose flour
  • 1 1/2 cup granulated, white sugar
  • 3 1/2 tsp. baking powder
  • 1 tsp. salt
  • 1/2 cup canola oil
  • 3/4 cup milk
  • 1 tsp. vanilla
  • 3 large eggs
Directions
  • Heat oven to 325 degrees.
  • Grease and flour cake pans. If using disposable pans, you can skip this step.
  • Place flour, sugar, baking powder, and salt into a large mixing bowl. Stir until well blended.
  • Add oil, milk, vanilla, and eggs to the bowl of dry ingredients. 
  • Beat at low speed for 30 seconds. 
  • Beat on high speed for 3 minutes, scraping bowl occasionally. 
  • Pour batter into cake pan(s).
  • Bake for about 30-35 minutes, or until a wooden tooth pick inserted into the center comes out clean. 
  • Gently remove the cake from the oven and place on a cooling rack until cool. 
  • Frost with desired frosting. 
Note: For mini-cupcakes put about 1 Tbsp. of batter into each liner and bake for about 12 minutes. I made 24 mini-cupcakes and 1-8" layer cake from one batch of cake batter.