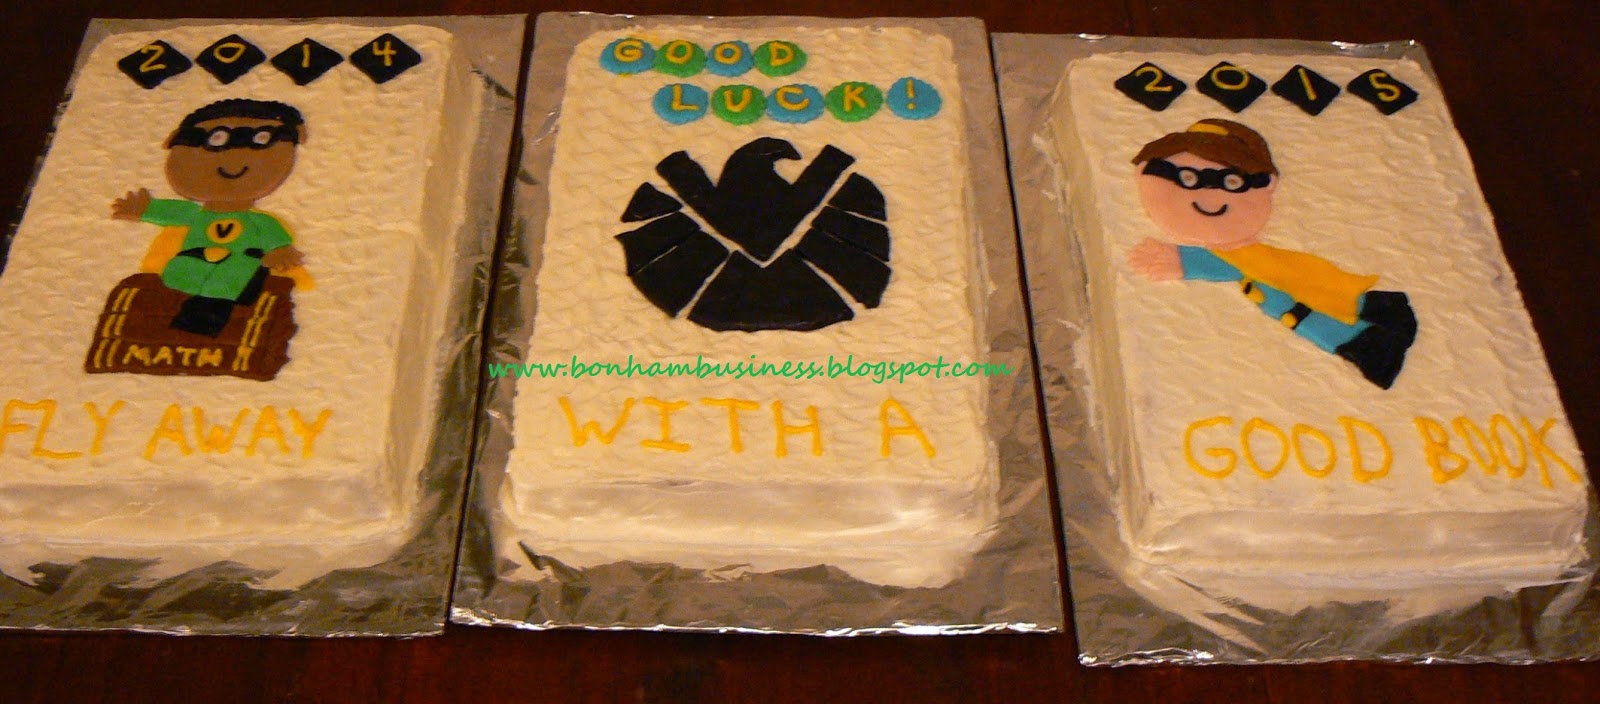
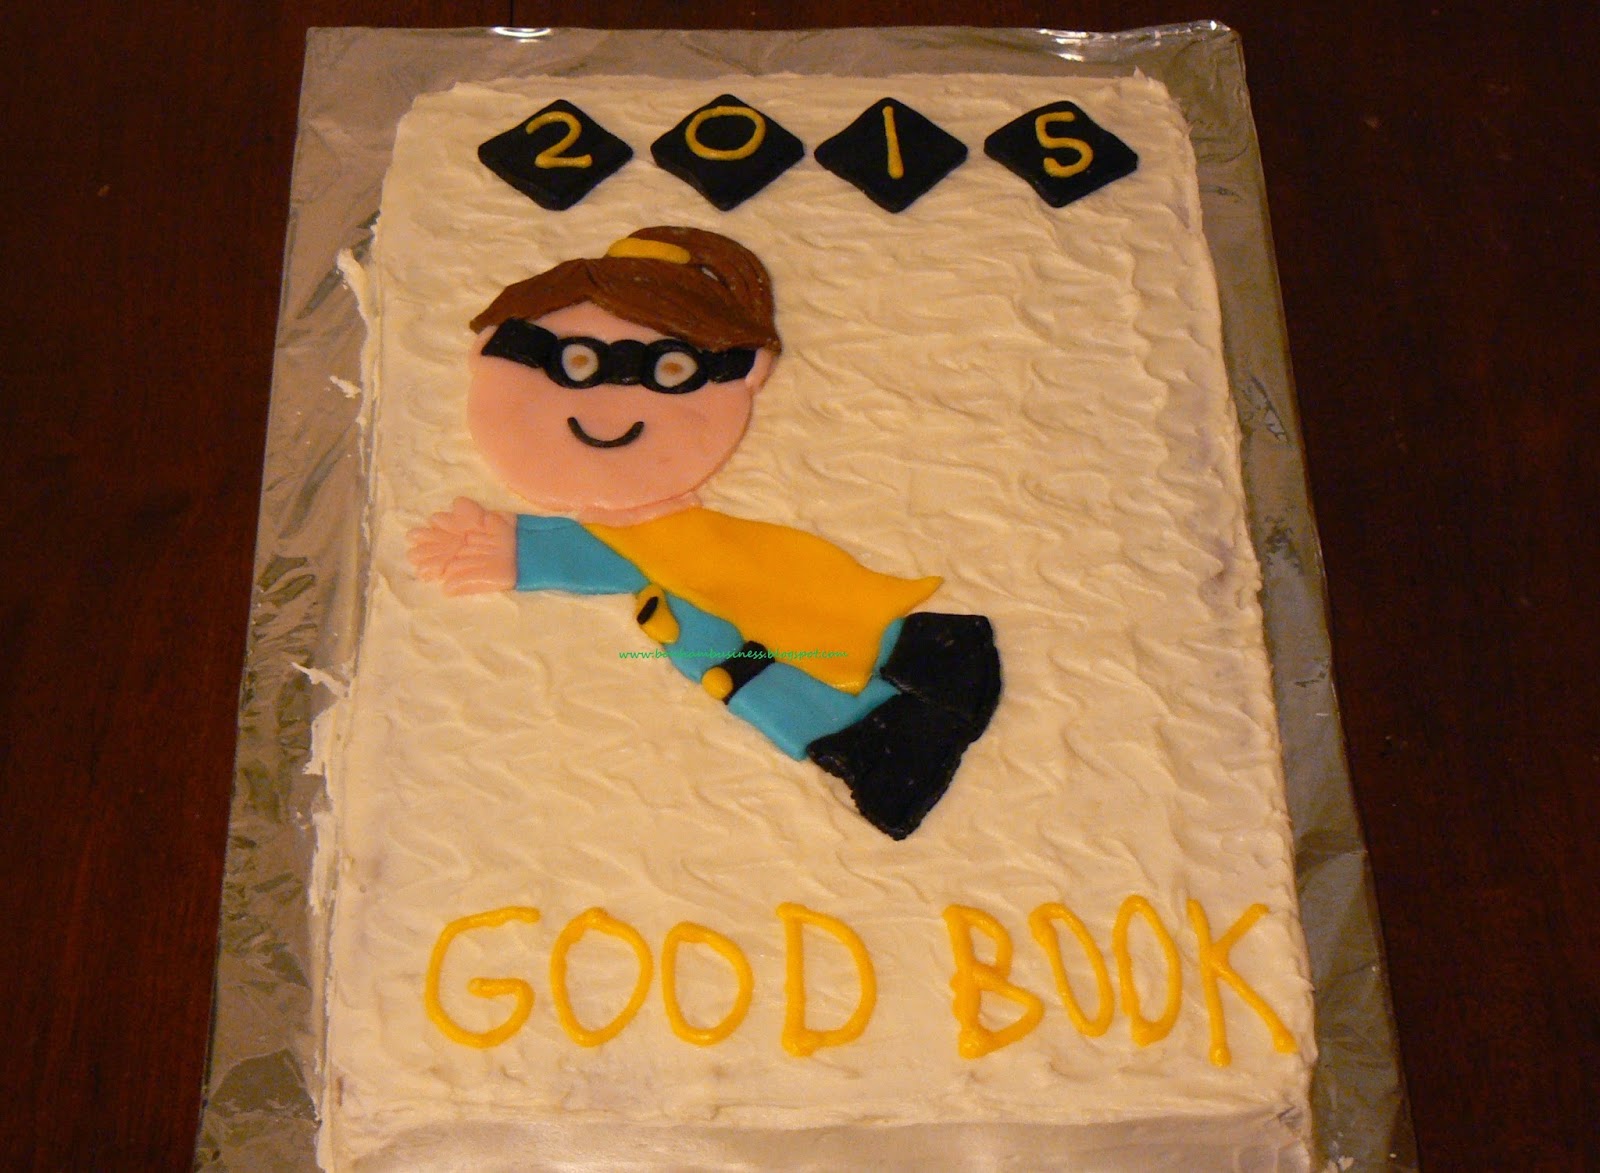
Wednesday, April 29, 2015

My Big Cake Adventure - A Trio of Half Sheet Cakes Part 2


The completed cakes
My "Big Cake Adventure" began at work. In Part 1 I told you about my job. I am employed full-time AND am a home baker. A home baker who did not fully understand the amount of work it would take to complete three half sheet cakes in a small home kitchen, using a normal oven, and a hand held mixer. However, the end result was worth it! The third through sixth grade students made a point to tell me how much they liked the cakes and how good the cakes were. Was it worth all the work on my weekend? I think so. 
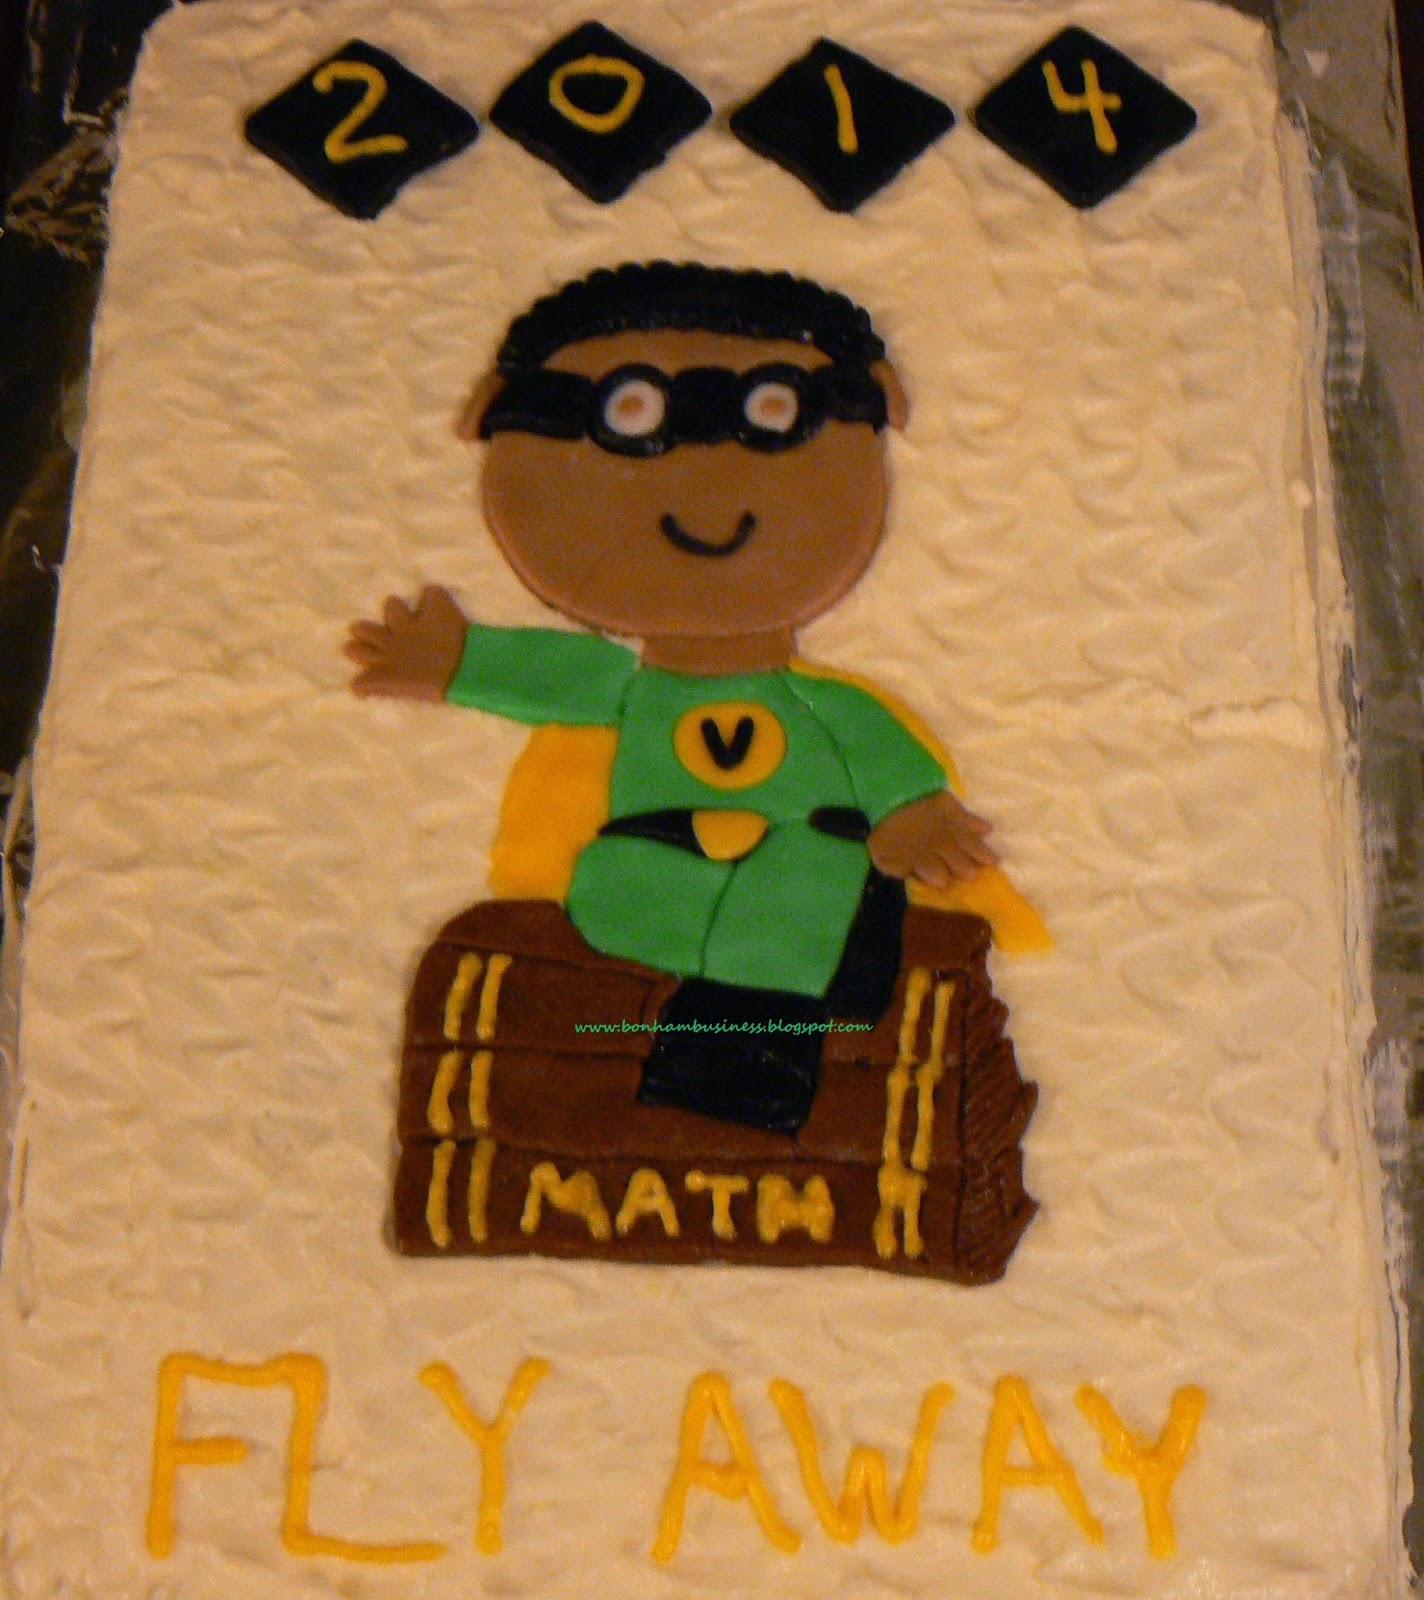
Our MAP theme for this year - "Superheros Fly Away With a Good Book" 
Planning the Decorations
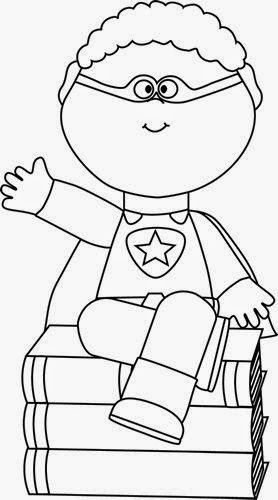
Once the theme for the testing was set, the search for three, 8.5 x11 inch clip art pictures began. The clip art pictures can not be too intricate because you will be cutting each picture apart to use as pattern pieces. I found the two clip art pictures below using a Google image search.
 
I made two copies of each picture. One copy is to determine color, add my variations, and give me a master picture to guide me. The other copy is cut apart to be used as pattern pieces for cutting the fondant pieces out. I use a paring knife that has a thin blade with a very narrow tip. A pizza cutter, round and square cookie cutter sets, and the open end of decorating tips are all very useful for cutting out fondant pieces. I use square cookie cutters to cut out squares of fondant. Then, a pattern piece is laid on top of the square and the square is trimmed and shaped into the correct shape. 

Color Selection
The first colors I knew would be on the cake are our school colors - black and gold (yellow). Plus, I wanted to use blue and green for the super hero costumes. Another item to think about was the color of my home made, rolled butter cream fondant.

I make chocolate fondant for black decorations and white rolled butter cream fondant (vanilla) for all decorations that are not black. This led me to make the following color choices:
  • black - super hero eagle silhouette, boots, belts, masks, letter tiles, and hair
  • yellow fondant - capes, belt buckles, and chest emblems
  • yellow butter cream frosting - lettering
  • dark brown (chocolate) - books and hair
  • light brown (a blend of both fondants) - skin and eyes
  • blue - costume and letter tiles
  • green - costume and letter tiles

Type of Food Coloring
  • yellow liquid food coloring
  • black gel food coloring
  • royal blue gel food coloring
  • kelly green gel food coloring
  • pink and copper gel food coloring (for the girl super hero's skin)

Suggested Timeline for a Home Baker 

Three days before the event
  • Buy or make cake boards. If making cake boards, use a heavy duty material! Believe me when I tell you even two layers of cardboard is too light for a cake this heavy. If I EVER tackle a cake this big again, I am making cake boards with quarter inch plywood. Then, I am keeping them forever! Learn from me.......Please.
  • Buy, or make all the frosting and fondant that you will need for cakes. I ended up making two double batches of butter cream frosting. I made each doubled batch of butter cream frosting in a four quart ice cream bucket. It was so nice to make and store frosting in the ice cream container.
  • Rolled butter cream fondant is easy to make and store. I like to separate the fondant into four equal parts, of about three quarters of a pound each, and flatten each into a disk. Then, I wrap each disk in plastic wrap, place the disk in a zip top bag, and place the bagged and wrapped fondant in the refrigerator. 
Two days before the event
  • Bake the cake, or cakes. A half sheet cake takes about 55 to 60 minutes to bake. 
  • Cool the cake for 5 minutes in the pan.
  • Put cake on a cooling rack and cool completely. Overlapping two cooling racks will work. NOTE - Do not use a cooling rack with a grid pattern. The grid will remove part of your cake top. Learn from my experience. 
  • Remove your fondant and frosting from the refrigerator so it can warm up and be ready to roll, or spread.
  • Place cake on prepared cake board. I did not find it necessary to trim the cake tops after cooling them. 
  • Frost cool cake with a thin, "dirty frosting" layer to seal the cake. 
  • Keep cake in a cool room, or in a refrigerator
  • Make your fondant pieces and place them on a parchment paper lined tray. Apply lettering to any fondant letter tiles you are using. Air drying them will make placing them on the cake top much easier. Keep far away from water, or moisture of any kind. Fondant will melt if it gets wet, or damp.
One day before the event
  • Remove frosting from the refrigerator and let it warm up. You will need to stir it, but I do not beat my finished butter cream frosting with a mixer. You can ruin a batch of home made butter cream frosting by over beating it. The fats and sugar separate and the frosting will look curdled. 
  • Early in the day, frost cake with its final layer of frosting. I waited about an hour for the butter cream frosting to form a crust. My home made butter cream frosting forms a crust in about thirty minutes, but I usually wait about an hour. 
  • Begin assembling decorations on top of your frosted cake. Push fondant decorations gently into the crusted frosting.
Sallee's Silky Smooth Butter Cream Frosting recipe                     Click here

Rolled Butter Cream Fondant recipe                                                Click here

Chocolate Fondant - Use the Rolled Butter Cream Fondant recipe. You will add 1/2 cup of baking cocoa along with the vanilla extract and salt. 

Is this enough information to help you begin a big cake adventure?

If you have any questions, post a comment, or email me through my website: 
www.salleebonhamwrites.com


Tuesday, April 21, 2015

My Big Cake Adventure - A Trio of Half Sheet Cakes Part 1

The basic ingredients for three half sheet cakes.
I updated the ingredient list on 4/29/2015. The cakes required another dozen eggs and one more two pound bag of powdered sugar.
For those of you who are new to my blog, I work at an elementary school. 

The annual state assessment testing is almost here. As an incentive, third through sixth grade students are served cake with lunch the day before testing starts. This year, my boss asked me if I thought I could make the cakes. 

Now, how did she know I had just bought a half sheet cake pan? Of course I agreed to make the cakes. I like to challenge myself with cake baking projects. Now I had to find out the answer to another question.

What I would need to make and decorate three half sheet cakes?
I am a home baker. I have decorated mini-cakes, 8 inch and 9 inch layer cakes, and even made my own wedding cake with spring form cake pans. (It looked like a tower of cake, but we were thrilled with it!) I am also familiar with 13 x 9 x 2 inch cakes that require one cake mix. However, I do not normally take a cake that size out of the pan, put it on a cake board, and decorate it. Plus, I needed to figure out how many cups of cake batter and  butter cream frosting I would need to frost and decorate the cakes. 

How many cake mixes would I need?
The directions that came with my half sheet cake pan said I would need three to four cake mixes per cake. A friend, who also has a half sheet cake pan, told me two mixes would be enough. Seeking to confirm the number of mixes I would need, I turned to an online search engine for answers. 

BettyCrocker.com is a very helpful website for a home baker. A Betty Crocker cake mix makes four to four and a half cups of cake batter. Plus, I found a list of how many cups of cake batter you need to make different sized sheet cakes. Yippee!  Fourteen cups of cake batter, or four boxes of cake mix per cake was listed to make one half sheet cake. I decided to go with three boxes of cake mix per cake.  

How much frosting would I need to make?
My online search also revealed the answer to my frosting question. Seven cups of frosting will frost a half sheet cake. My butter cream frosting recipe yields four cups of frosting. A double batch will give me a cup of extra frosting to use for piping borders. Okay, now to sit down and figure out the ingredient amounts.

Sallee's Ingredient List for Three Half Sheet Cakes

  • 12 - 16.5 ounce boxes of white cake mix
  • 1 - 48 ounce bottle of canola oil
  • 3 dozen large eggs
  • 6 - 2 pound bags of powdered, or confectioners sugar
  • 1- 48 ounce can of vegetable shortening
  • 1 pound of butter
  • 1 pound of margarine
  • 1 can of canola oil no stick cooking spray
Let the Baking Begin!
Actually, I will not be baking until Saturday. However, I am going to start making  the royal icing cake top decorations tomorrow, three days before I start baking cakes. 
ABP (After Blog Post lol...lol),  I changed my mind about making royal icing decorations. Instead, I chose to stay with a method that I am familiar with - home made, rolled butter cream fondant. 


Sunday, April 19, 2015

Chocolate Glazed Orange Crumble Coffee Cake

Never eat another doughnut again! This delicious coffee cake is flavored with orange zest, fresh squeezed orange juice, and brown sugar crumb topping. Then, the orange coffee cake is paired with a chocolate glaze that only takes ten minutes to make. I like doughnuts, but I LOVE this orange crumb coffee cake! 

The Recipe

Yield: 12-16 servings

Equipment

1 small to medium  bowl
1 medium to large bowl
2 cup liquid measuring cup
9 x 9 x 2 inch baking pan
wire whisk

Ingredients for the Crumb Topping and the Orange Coffee Cake

1/3 cup brown sugar, packed                                         1 cup granulated, white sugar
2 cups all purpose flour                                                   3 teaspoons baking powder
1 teaspoon salt                                                                1/2 teaspoon cinnamon
1/3 cup butter, softened                                                   3 Tbsp. of  butter, firm                   
3-4 medium to large oranges                                           1/2 cup milk                                     1 egg                                                                                Pan coat, or cooking oil spray                                                                  

Directions

  • Heat oven to 350 degrees Fahrenheit. Spray baking pan coat, or cooking oil spray and set aside.
Brown Sugar Crumble 
  • In a small to medium bowl, place 1/3 cup of packed brown sugar, 1/4 cup flour, 1/2 tsp. cinnamon, and 3 Tbsp. of butter.

  • Mix all ingredients until the mixture is crumbly. This is your crumb topping. 
  • Set aside.
Orange Coffee Cake
  • Using a zester or small grater, remove 2 - 3 Tbsp. of the orange rind
 

  • Cut the oranges in half and squeeze the juice into a one cup measuring cup until it measures 1/2 cup of orange juice.
  • In medium to large bowl, place 2 cups of flour, 1 cup of sugar, 3 teaspoons of salt, 3 tsp. baking powder, and 2-3 Tbsp. of orange zest.
  • Blend the dry ingredients with a wire whisk until spices are distributed evenly.
  • Pour 1/2 cup of milk into the 1/2 cup of orange juice.
  • Pour the liquid mixture into the dry ingredients, add the egg, and 1/3 cup of softened butter into the dry ingredients.
  • Stir with the wire whisk until the batter is well blended. About 1 1/2 - 2 minutes.

  • Pour half of the batter into the baking pan. Just guesstimate. It really doesn't have to be exactly half. 

  • Sprinkle half of the crumb topping  on top of the batter in the baking pan. Again, I just guesstimate. The end result will be just as good. Trust me.

  • Pour the other half of the batter into the baking pan.
  • Sprinkle the remaining crumb topping across the top of the batter.
The top layer doesn't have to cover the bottom layer exactly. Just sprinkle the crumb topping across the top. 
  • Place the pan in the oven and bake for about 30-35 minutes. 
  • Insert a toothpick into the center of the cake and remove. If just a few crumbs cling to the toothpick, or the toothpick is clean, remove the cake from the oven. 
Do not worry about the top being uneven. The chocolate glaze will completely fill in and level the cake top. Look at the last picture and you will see how pretty your cake will look with the chocolate glaze on it.
  • Cool completely before pouring the chocolate glaze on top of the cake.
Chocolate Glaze Ingredients - Prep Time about 10 minutes
  • 1/3 cup butter
  • 2 cups powdered sugar
  • 3 Tbsp. baking cocoa
  • 2-3 Tbsp. hot water
Directions
  • Heat butter in a saucepan until melted.


  • Stir in powdered sugar and cocoa with a whisk until well blended. It will clump together and that is okay. Just go to the next step.
  • Add 2-3 Tbsp. of hot water and whisk until the glaze is the consistency of thick honey or syrup. I only used 2 for this cake.
  • Pour over the top of the cooled, orange crumble coffee cake and spread across the cake with a rubber, or silicone spatula. The glaze sets up very quickly.

You are now ready to eat a slice of home made happiness on a plate!

Sunday, April 12, 2015

Farmington MO Weekend

This weekend, I am in Farmington, MO attending the Christian Motorcyclists Association Missouri Womens Conference. The caterer for the Saturday night meal was Bay Lee Jo's BBQ and Seafood from Ironton, MO. The pulled pork and original BBQ sauce was amazing. We were told that the owner smokes the meat with cherry wood.Dessert was cheesecake. Yes, luscious, slightly tangy, cheesecake.


Another gem, was the Coffee Grill, on Flat River Road. The fried pickles were great!


I will be posting more after I arrive at home, download my phone pics, and rest up a little bit.

Monday, April 6, 2015

Bunny Basket Cupcakes


Ingredients and Materials
  • 24 baked cupcakes (1 cake mix)
  • leaf green frosting - For frosting recipe  click here   Use the small batch variation.
  • 1 package of 12 Peeps bunnies
  • 1 package of strawberry Twizzlers
  • 1 package of Easter Mix Sixlets candy
  • Leaf decorating tip #72
  • a disposable pastry bag
  • round toothpicks
Directions

1. Frost tops of 24 cupcakes with a thin coat of leaf green frosting

  • Using a pastry bag and #72 leaf tip, apply frosting "grass" around outside edge of a cupcake and continue filling in the top until the cupcake is covered in frosting "grass". 
leaf tip #72 makes "grass" 


  • Repeat until all 24 cupcakes are frosted.


2. Remove Peeps bunnies from the package and separate.

  • Place a round toothpick halfway into the bottom of a Peeps bunny. Repeat with remaining Peeps bunnies.
  • Center a Peeps bunny over a cupcake, bottom side down, and press into the frosted cupcake. 
  • Repeat with remaining Peeps bunnies.
3. Remove 12 Twizzler sticks from the package.

  • Carefully slide a toothpick halfway into each end of a Twizzler stick.
  • Repeat with remaining Twizzler sticks
  • Insert toothpick end of a Twizzler stick into a cupcake beside a Peeps bunny.
  • Insert other end of the Twizzler stick into the cupcake on the opposite side of the Peeps bunny. This arch will be the "basket handle" of the Bunny Basket Cupcake.
  • Repeat with remaining eleven Peeps bunny cupcakes.
4. Remove tubes of Sixlets candy from the package.

  • Open up several tubes of candy and pour the round candies into a small bowl.
  • Place 4 candies, two in front - two in back, on each Bunny Basket cupcake
5. Decorate 12 "grass" cupcakes


  • Open about 10 tubes of Sixlets candy and pour the round candies into a small bowl.
  • Place 5 candies on each cupcake
Now you have 12 Bunny Basket Cupcakes and 12 Easter Egg Cupcakes.


Sunday, April 5, 2015

HE IS RISEN! Crown and Flower Cookies for Sunday School

Kid art Easter crown and flower cookies. Jesus traded his crown of thorns for his heavenly crown when he arose on Easter Sunday morning. In remembrance of this event, I made my almost famous, sugar cookies and piped on royal icing in purple and yellow. Purple for royalty and yellow for remembrance. 

Happy Easter! 

Royal Icing Recipe                          Click Here
Sallee's Sugar Cookies Recipe       Click Here